Introduction
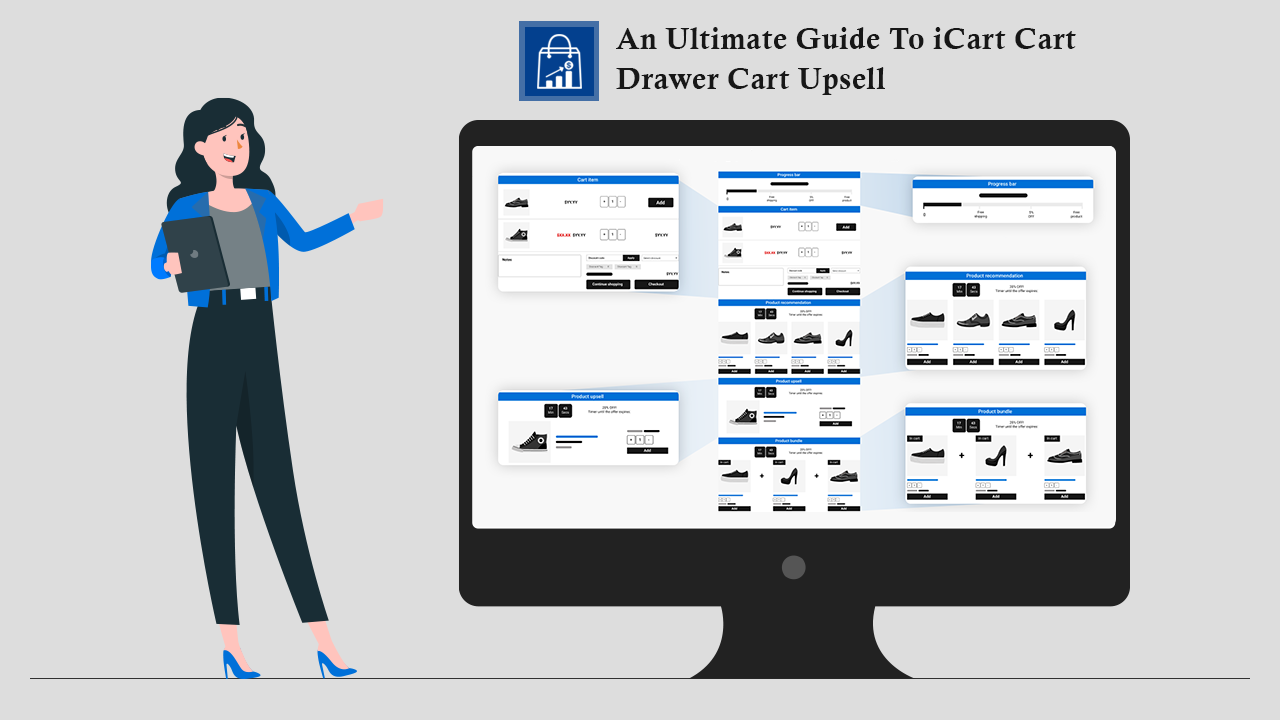
iCart is an all-in-one app for side cart customization and conversion optimization.
This Shopify upsell app helps you in designing your cart drawer and generating sales by:
- Showing upsells
- Product recommendations with time-sensitive offers
- Gift wraps
- Countdown timers
- Discounts, and many more.
Getting familiar with the Dashboard
After installing the app, the first page that you will be able to see is the dashboard. Here you can find a default template. You can customize it in your own way.
By clicking on the “Preview” button, you can see what the template will look like, and by clicking on the “Customize” button, you can start customizing the template.
On scrolling down the page, you can see the analytics section, which shows you the following analytics report:
Revenue Generated
Here you can see the total revenue generated on your store after installing iCart in your store. You can view the analytics by changing the date from the calendar.
Order Generated
This report shows the total number of orders generated in your store after iCart has been installed.
ROI
Here you can view the Return on Investment of your store after iCart has been installed.
App Orders AOV
This option shows you the total average order value of your store after iCart has been installed.
Total Store Orders
Here you can view the total number of orders in your store after iCart has been installed.
iCart Impressions
The number denotes the total number of times iCart’s content was displayed for your users.
iCart Conversion Rate
Here you can see the total number of conversions (purchases that are done through iCart).
iCart Abandonment Rate
It shows the total percentage of people who left the checkout page without taking any action.
Widget
Here you can see the list of deleted widgets that would be displayed in red color with their impressions. Those that are undeleted would be displayed in black.
Settings
By clicking on the settings button you can enable/disable the app.
Referral Program
Through this program, you will get a commission of 20% by sharing iCart with other friendly stores.
If you want to know more about the referral program and how to join the referral program, then here is the complete guide for you.
General Settings
Under this option, you can customize the following options:
- Cart header
- General settings
- Cart bubble settings
Cart Header
Under this option, you can change the heading of the cart drawer, the color of the header text, and the size of the header text.
General Settings
Maximum Number of Widgets to Display
Here you can add the number of widgets that you want to show in the cart drawer.
Cart Bubble Settings
Under this option, you can show/hide the sticky cart drawer, change the icon of the cart, the color of the cart bubble and its icon, and the position of the cart bubble.
Also, you can show/hide the cart item count bubble, change the background color of the cart bubble, and the color of the cart item bubble text.
Getting Familiar With iCart Widgets
Progress Bar Widget
This widget allows you to show the offer, like free shipping, percentage, and fixed discount that you would like to give to your customers.
How to customize the Progress Bar widget?
Product Upsell Widget
This widget allows you to show upsells in the cart drawer for your customers.
Read more to know: How does the product upsell widget work?
Cart Item Widget
This widget helps you add more attractive features to your cart items and boost your sales with various upselling options.
Read more to know: How can I customize the cart item widget?
Product Recommendation Widget
This widget allows you to add the products that you want to recommend to your customers in the cart drawer.
Read more to know how the product recommendation widget works.
Image with the Text Widget
This widget allows you to add an image with text for your customers in the cart drawer.
Read more to know: How can I customize this widget?
Custom HTML Widget
With this widget, you can add the HTML code and create custom buttons or anything that you want to show in the cart drawer.
Read more to know: How to add custom buttons in the side cart.
Discount Widget
This widget allows you to display the discount widget for your customers, from which they can use discounts for their products.
Read more to know: How does the discount widget work?
Checkout Button Widget
With this widget, you can add the checkout button to the cart drawer.
Read more to know: How to customize this widget?
Product Bundle Widget
The Product Bundle widget helps you to offer multiple products in a single bundle with attractive discount offers to your customers.
Read more to know: Check out how you can add and customize the product bundle widget.
Order Delivery Date Widget
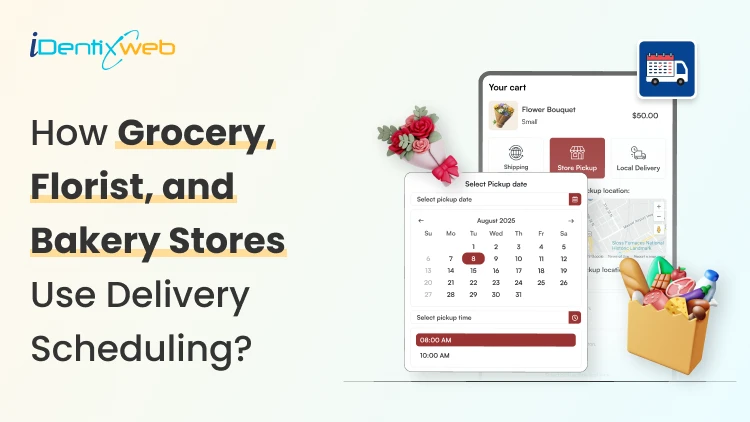
As Order Delivery Date is integrated with iCart so by adding this widget, you can add the Order Delivery calendar in the cart drawer.
Here, customers can choose the specific date and time at which they want to get their order delivered.
Read more to know: How does this widget work?
Birthday Collector
This widget allows you to collect the birthdays of your customers and offer them special discounts on their purchases.
Read more to know: Read this guide to know how this widget works.
Survey
This widget allows you to create a survey form for your customers so that you can collect the experience from your customers from your store.
Read more to know: How to create the survey form?
New features of iCart
Multicurrency
iCart has updated this new feature, which allows customers to choose the desired currency.
You can add different currencies that you want to show in your store, which will help your customers to select the one in which they want to view the price of products.
Products will be sold to the customers based on the currency that they have selected.
To find this feature go to your Shopify store’s Settings > Payments


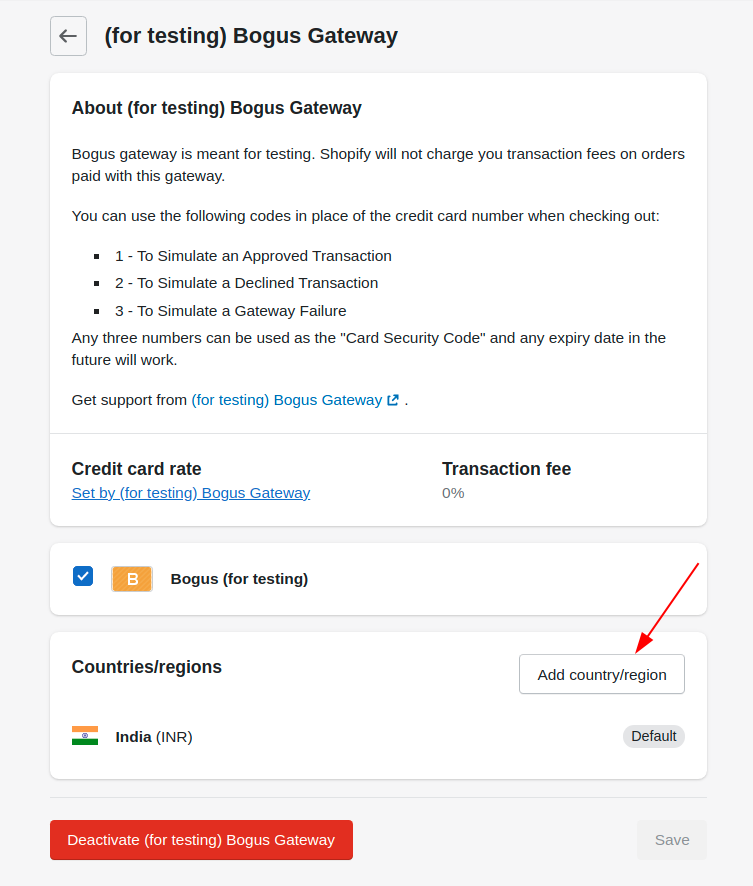
After clicking on the payments option you can see an option called Bogus Gateway. Click on the Manage button.

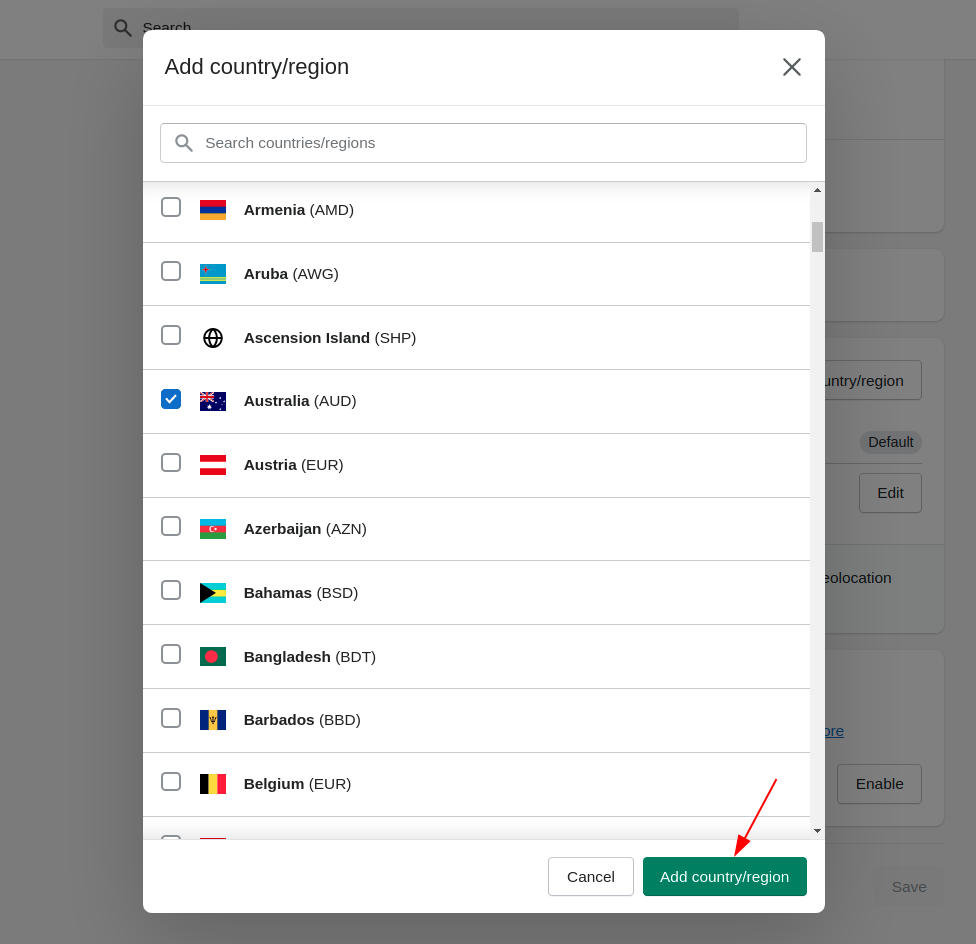
Now click on Add the country/region button which will allow you to add the countries/regions that you want to show on your store for your customers.
After adding the countries/regions click on the Add country/region button to get added to your store.
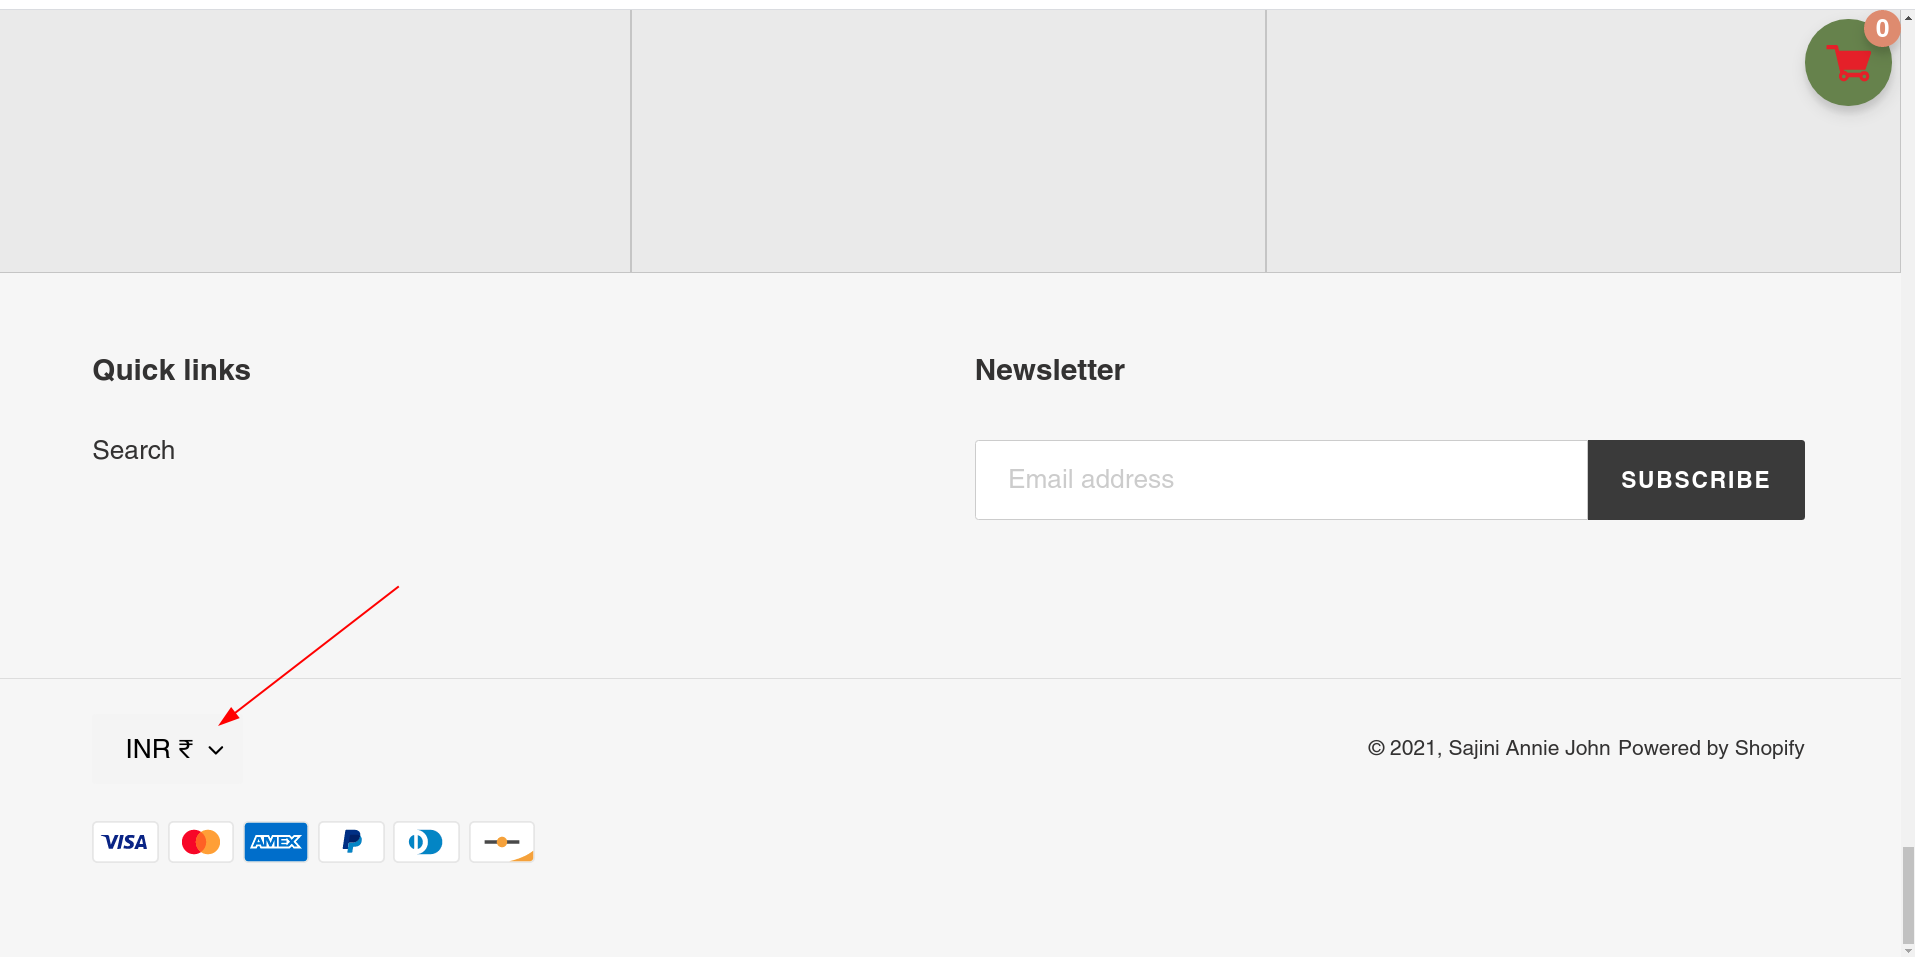
After adding the countries/regions the option displayed on your store may look like as shown in the image below.
Terms and Conditions
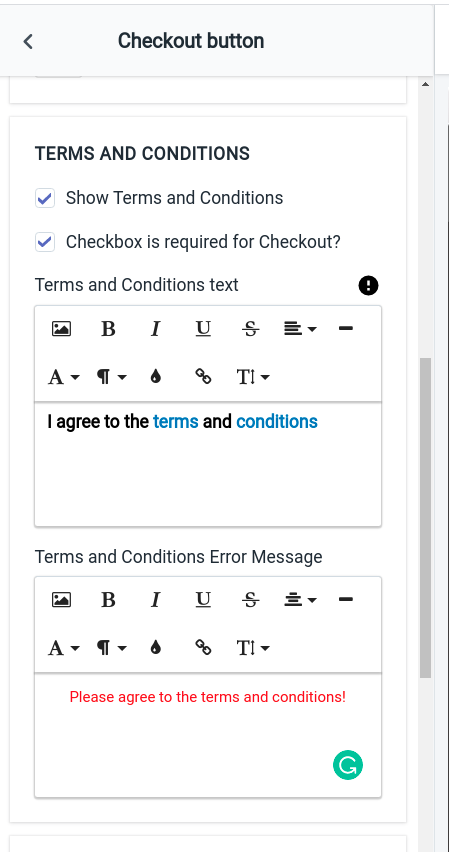
You can find this option within the checkout button widget, which allows you to show terms and conditions at the checkout button.
As shown in the image below, you can show/hide the terms and conditions, change the text of the terms and conditions agreement, and change the terms and conditions error message.
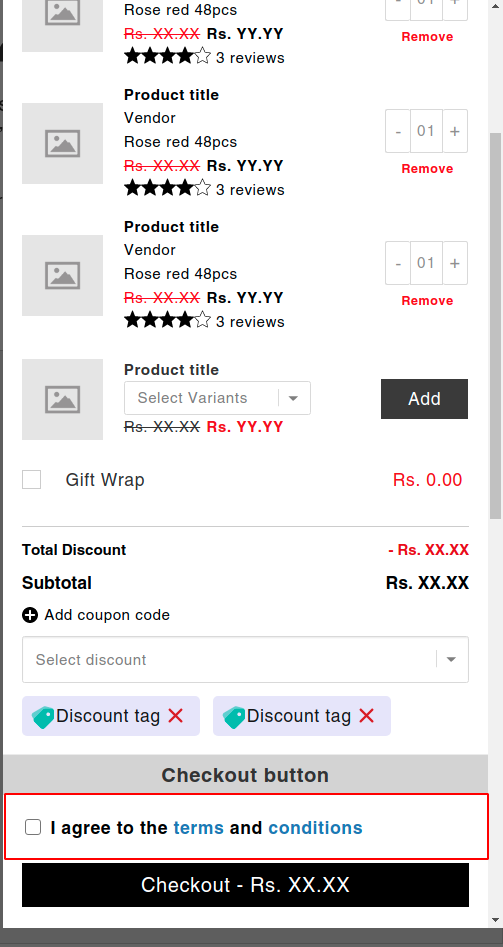
After enabling the terms and conditions option it will be displayed in your store as shown below.
Urgency Countdown
This option will encourage your customers to buy by showing them a visual countdown timer. You can find this option from the cart items widget.
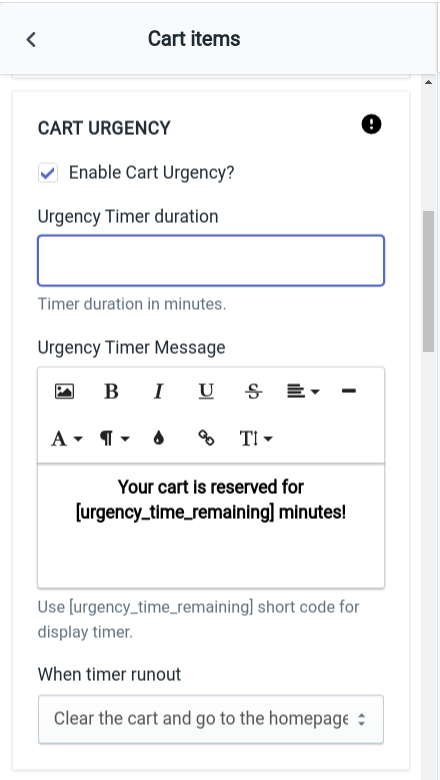
As shown in the screenshot below, you can enable or disable cart urgency in your store.
By enabling the cart urgency, you can add the timer duration, change the urgency timer message, and set the action to be performed when the timer runs out.
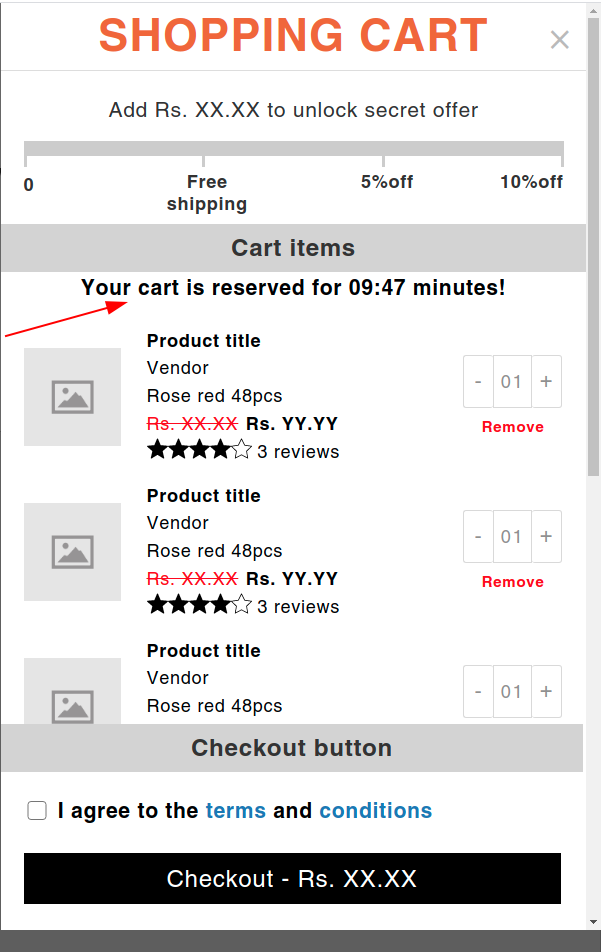
After enabling the cart urgency in your store, it may look as shown in the image below.
Coupon Code
iCart supports the discount option provided by Shopify, by which you can give your customers a coupon code to avail the discount.
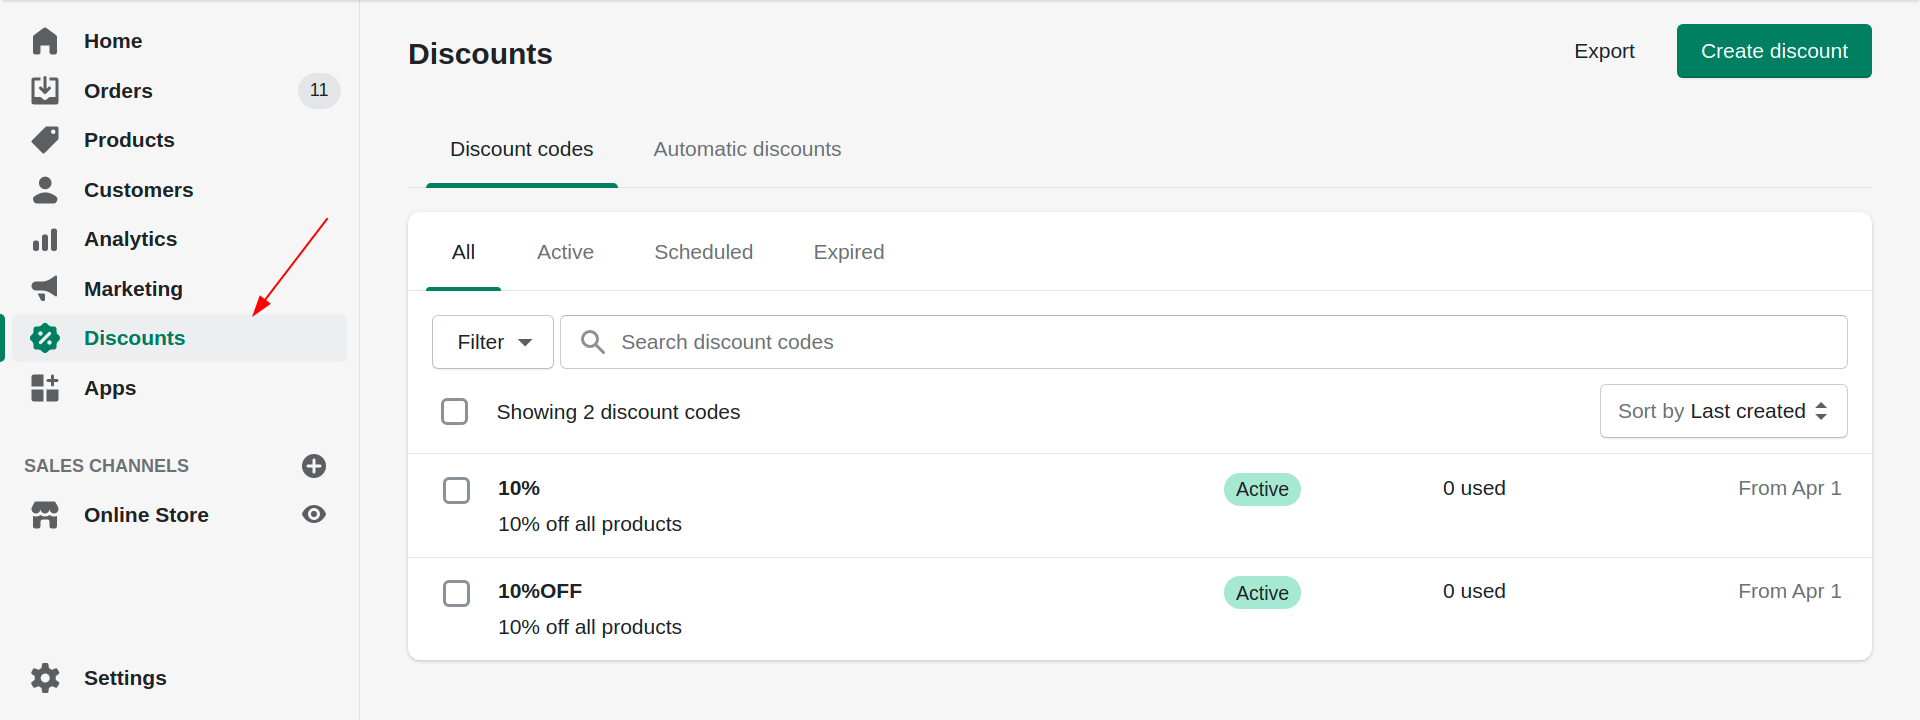
By clicking on the discount button, you will get 2 options: discount codes and automatic codes.
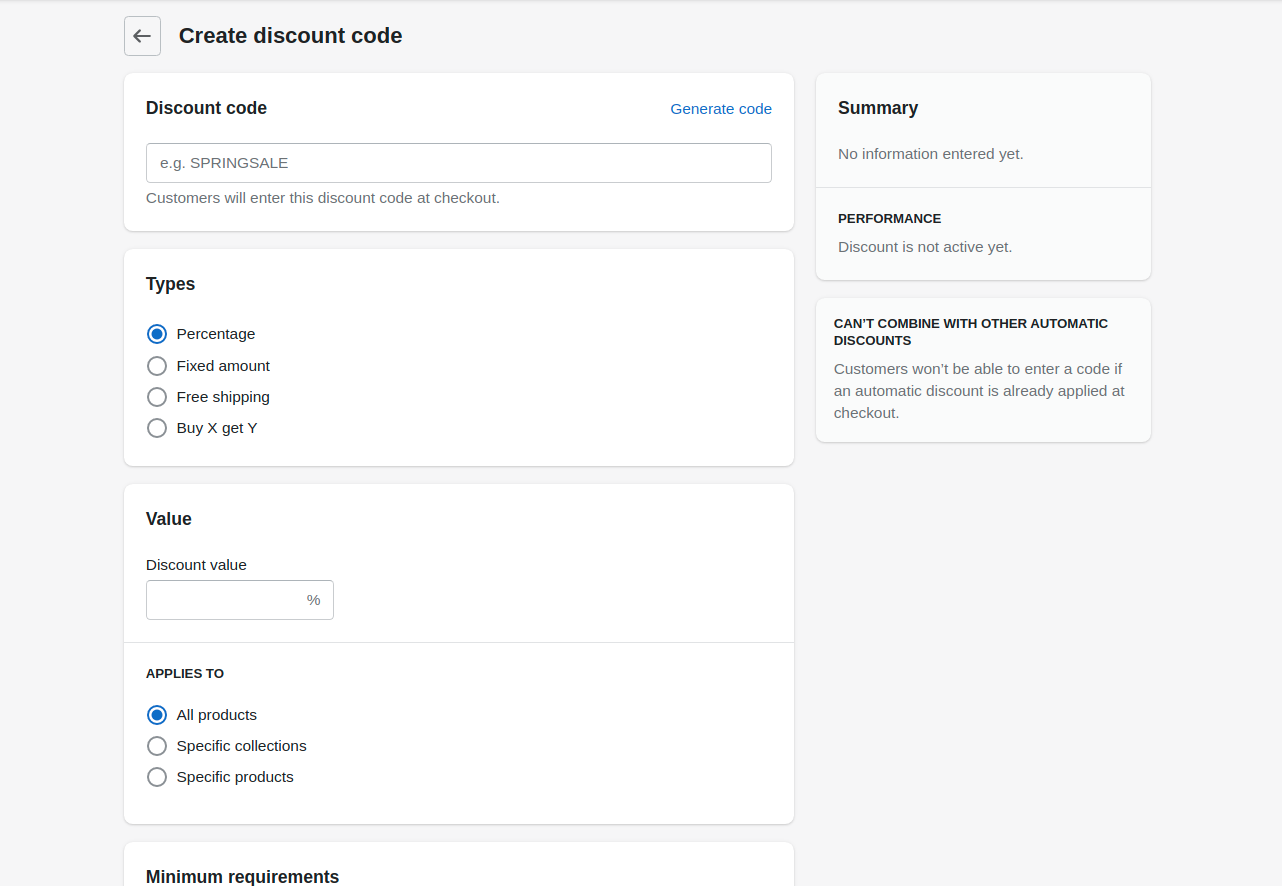
In the discount code option, you can create a discount code by which your customers will get a discount if they enter the code at checkout.
By clicking on the create discount button, the page below will be displayed, in which you can add the required details and create a coupon code for your customers.
Similarly, when you click on automatic discounts, your customers will get a discount automatically in their cart.
Here also you can also create the discount code similarly to how you created it in the discount code option.
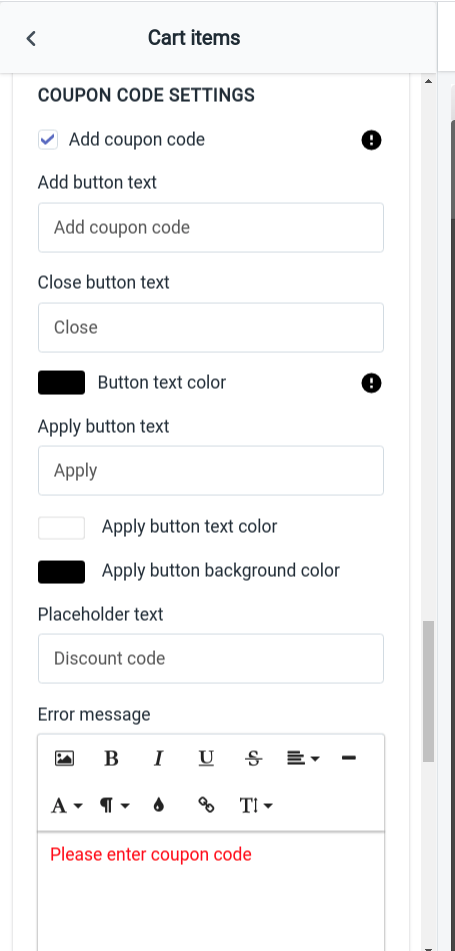
After creating the discount codes over here, you can make this option available on your store from the cart items widget as shown below.
Enable the add coupon code checkbox to make this option visible in the side cart on your store.
By enabling this option, you can change:
- Text of the add button and close button
- The text color of the button
- The text of the apply button
- Text color of the apply button
- Background color of the apply button.
To know more details about iCart, please refer to the video tutorial below.



About the author
Sajini Annie John
Meet Sajini, a seasoned technical content writer with a passion for e-commerce and expertise in Shopify. She is committed to helping online businesses to thrive through the power of well-crafted content.