Create New Table
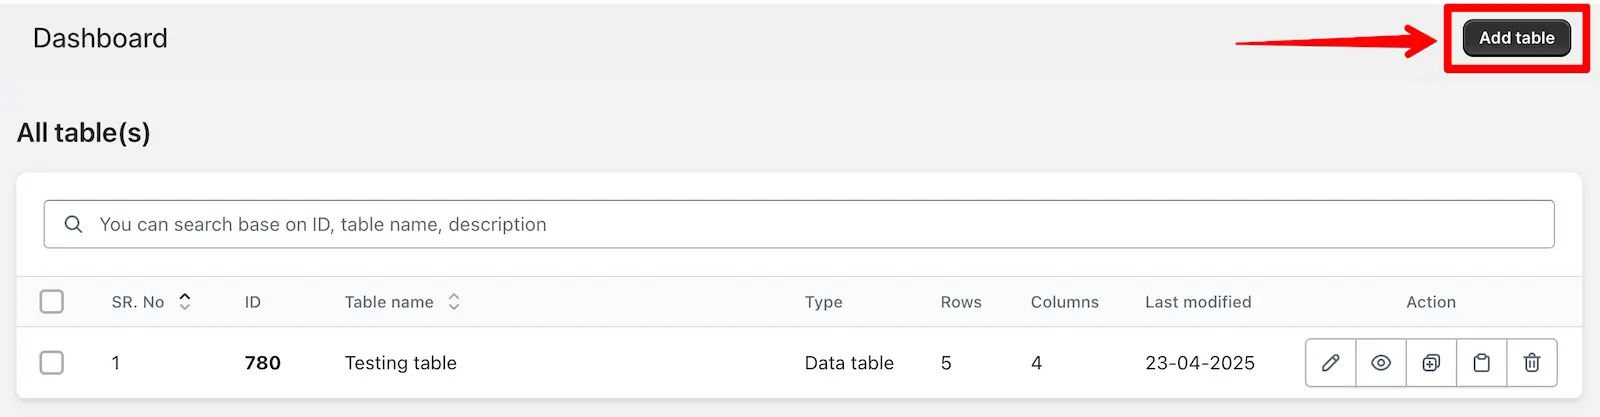
You can create a new table from the Dashboard page of the app. Follow the steps below to create a new table:
Steps:
- Go to your Shopify Admin and open the Tablepress App
- Once the app is opened, the Dashboard page will be displayed, and you will see an ‘Add Table’ button at the top-right corner.
- Click the “Add Table” button. You will be redirected to the Create Table page, where you can choose how to create your table.
On the Create Table page, you will see Three options:
- Create a data table manually
- Create a data table by importing data
- Create size chart Table
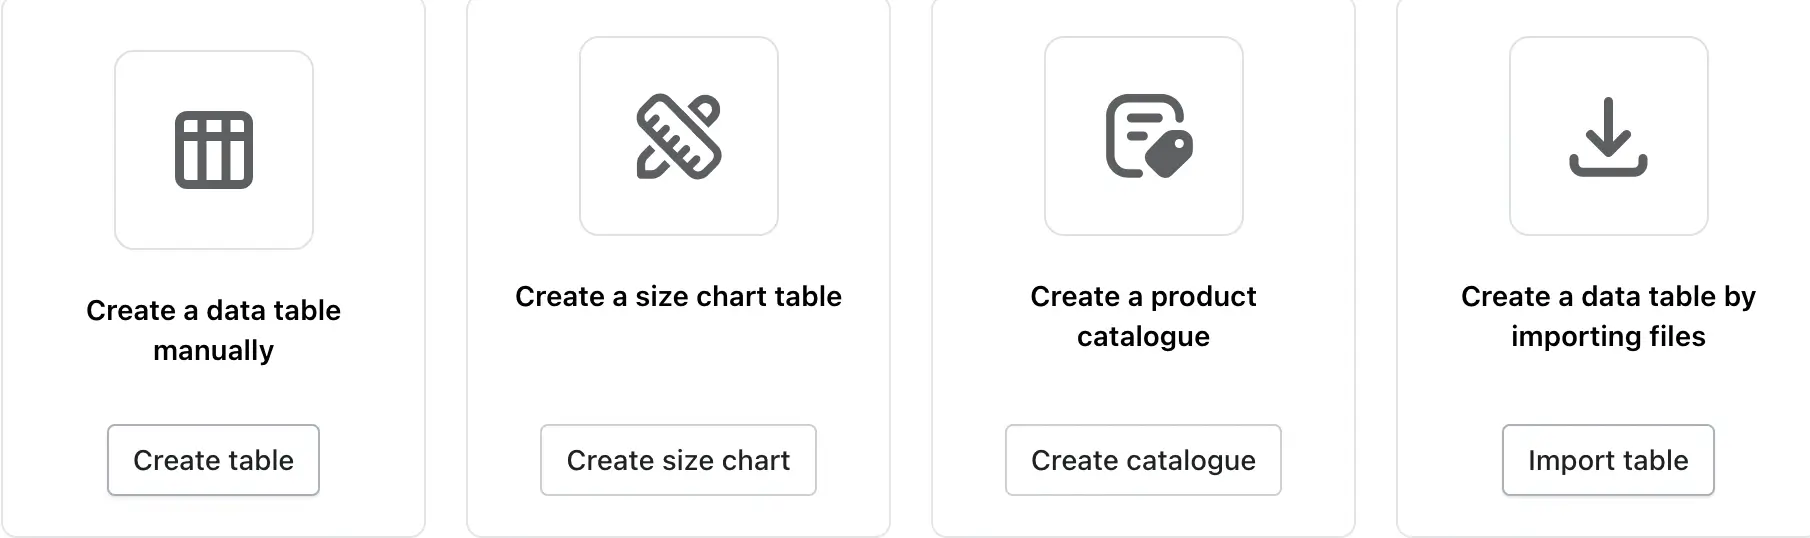
Create a data table manually
You can manually create a table by defining its name, number of rows, and number of columns using the admin interface.
1. Go to your Shopify admin, open the tablepress app, and add the table from the Dashboard by clicking the ‘Create Table’ button on that page.
2. You will be redirected to a table page and add data as per your choice.
3. After entering the required information, click Save.
4. You will then be taken to the Table Manipulation page, where you can:
- Table Data: Enter and manage table data
- Table Design: Customize the table design
- Import_Export: Import or export table data
- Disaply Rule: Copy the shortcode of the specific table for embedding
For more detailed information on all features of table manipulation, please refer to our Table Manipulation Guide.
Create size chart table
In an e-commerce platform, size charts help customers choose the correct fit for clothing, footwear, accessories, and other size-sensitive products. The types of size charts can vary based on the product category, region, and target audience.
To create a new data table or size chart, simply click the “Add Table” button located at the top right corner of the page.
- Log in to your Shopify admin account.
- From the left-hand menu, click on Apps.
- Select TablePress from the list of installed apps.
- You will be redirected to the Dashboard page.
- Click on “Add table” button to create size chart
- On the next page, you’ll see options like Create table, Import table, and Create size chart. Click on Create size chart.
For more detailed instructions on the Create Size chart, Please refer to out Size chart Guide.
Create a Product Catalogue
The Product Catalogue feature lets you quickly create tables to display specific products or collections.
You can then embed these tables on any page of your Shopify store.
Follow the steps below to create a product catalogue table:
- Go to your Shopify Admin.
- Open the TablePress app and navigate to the Dashboard page.
- Click the “Add Table” button in the top-right corner.
- Select “Create a Product Catalogue” from the options that appear.
For more detailed instructions on the product catalogue, Please refer to out Create a Product Catalogue guide.
Create a data table by importing files
Click the “Import Data” button to begin uploading your file. The Import page will open, where you can complete the data import successfully.
To create a table from an existing file, follow these steps:
1. After clicking the “Add Table” button on the Dashboard, select the Import Data option.
2. Upload a supported file format such as .xls, .csv, or .json.
3. A new table will be automatically generated based on the content of the file.
4. Customize the table as needed.
For more detailed instructions on the import feature, please refer to our Import Table Guide.
Pre-designed Templates
Pre‑designed templates are ready‑built table layouts that let you skip the tedious work of structuring and styling a table from scratch. Instead of starting with a blank grid, you open a fully formatted example that already contains placeholder (sample) data and the interactive features suited to a specific purpose—search boxes, sortable headers, comparison columns, price ribbons, size columns, and so on.
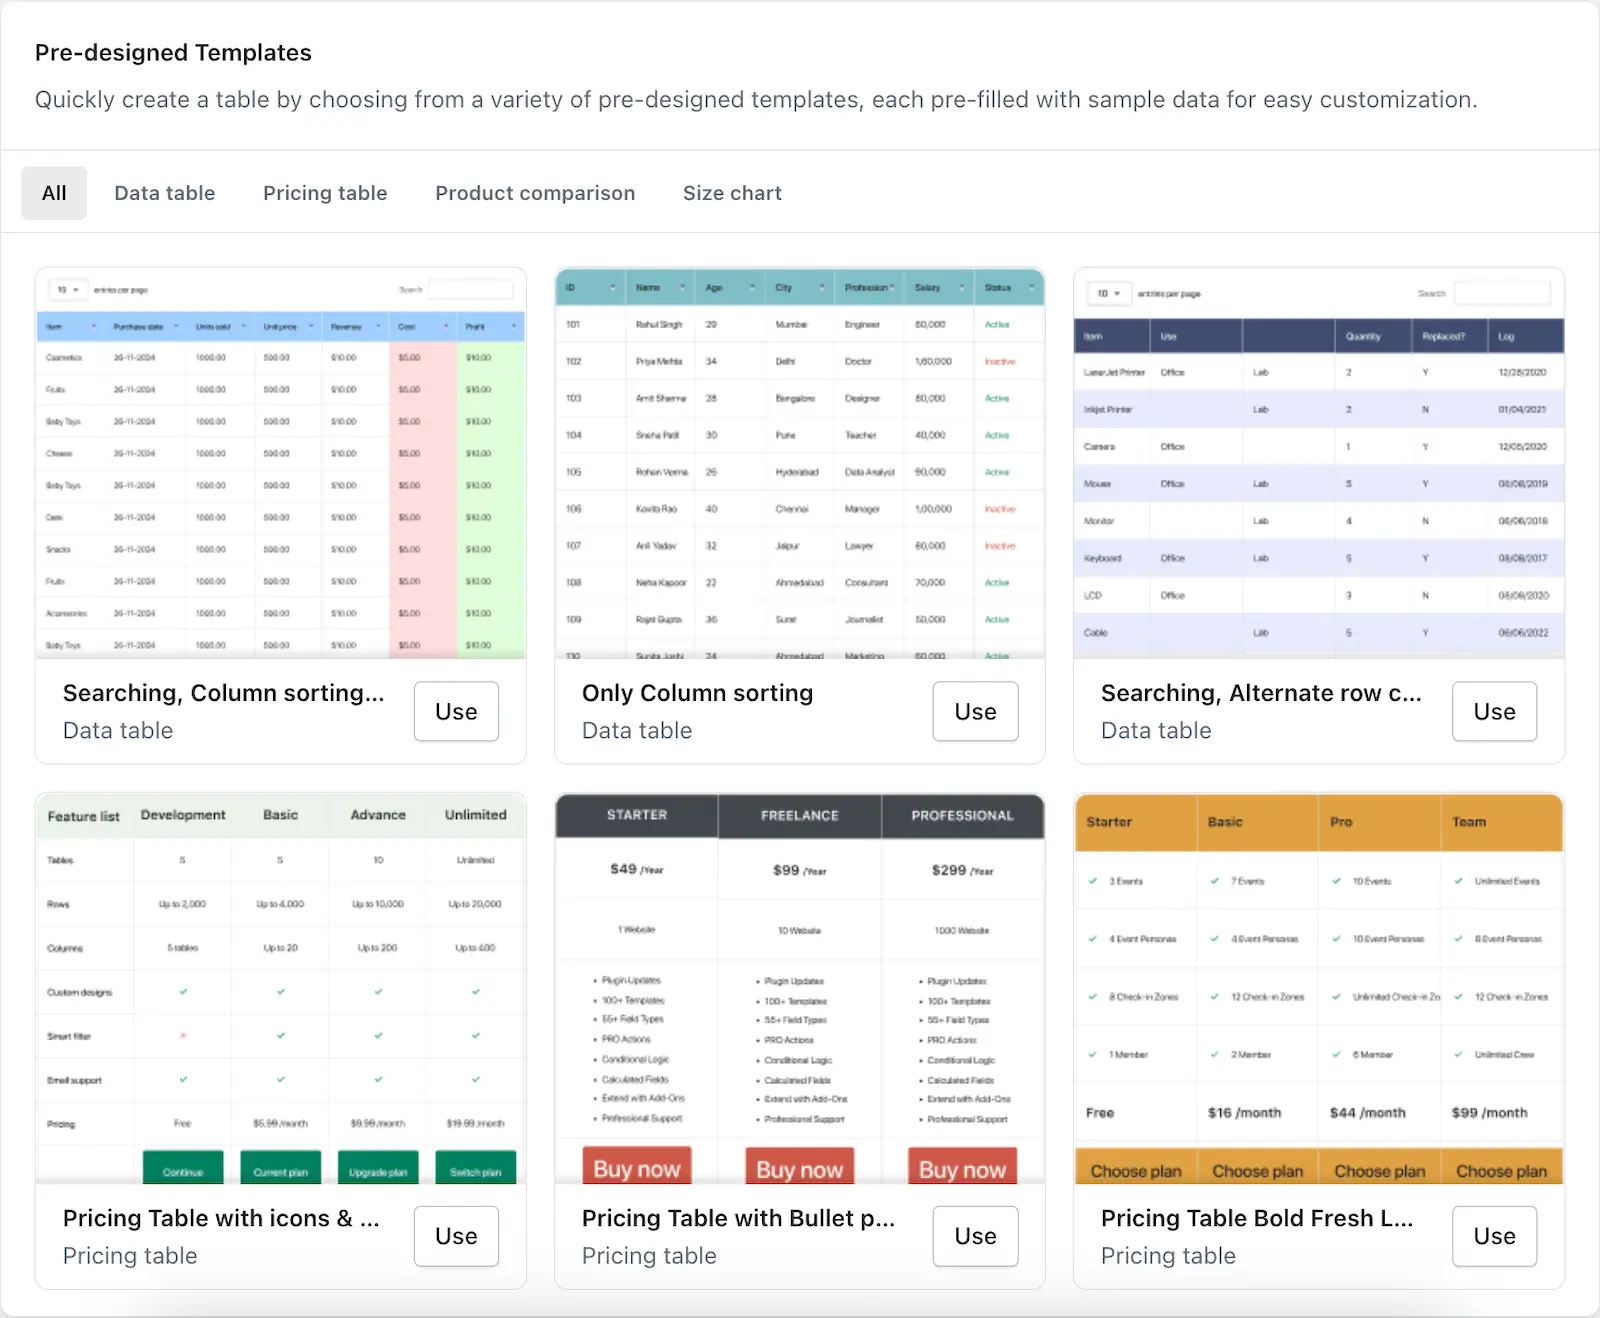
How to use a template:
- Go to your Shopify admin and open the TablePress app. From the dashboard, open the Pre‑designed Templates panel.
- Browse the templates and see previews until you find a style that matches your goal (e.g., searchable inventory list, plan comparison, size guide).
- Click on use and table will get created with the same sample data and design which shown in preview.
- Replace your data in the table as per your choice.
- Tweak colors or fonts in the design settings if you want to align the table even more closely with your theme style.(Optional)
That’s it—within a few minutes you have a polished, interactive table that would have taken much longer to build manually.
If you’d like to explore all available table templates and designs, please see our separate guide Design Templates.