The Net Payment Method allows you to offer net payment terms to your customers, meaning they can purchase products and pay for them at a later date, based on agreed-upon terms (e.g., Net 30, Net 60). This is a common practice in B2B transactions where businesses often need time to process payments.
You can set specific payment terms (e.g., Net 30, Net 60) that allow customers to pay for their purchases within a certain number of days after the invoice is issued.
Feature Status
Purpose: This section allows you to activate or deactivate the “Net Payment Method” feature on your website.
Action: Toggle the feature on or off based on whether you want to offer net payment terms to your customers.

Install Net Terms
This step ensures that the net payment terms feature is displayed on your storefront.
Action:
- Go to your Shopify theme editor.
- Add the app block provided by Wholesale Hero & B2B to your theme.
- This will enable the net terms feature to appear on your store’s front end.
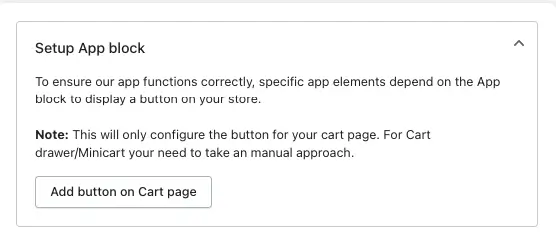
Activate the Setting to Use Net Payment Terms
This section explains how to activate the net payment terms feature.
Action:
- Activate: Toggle the setting to enable net payment terms.
- Setup App Block: Ensure the app block is correctly installed in your theme to display the necessary buttons.
Manual Setup
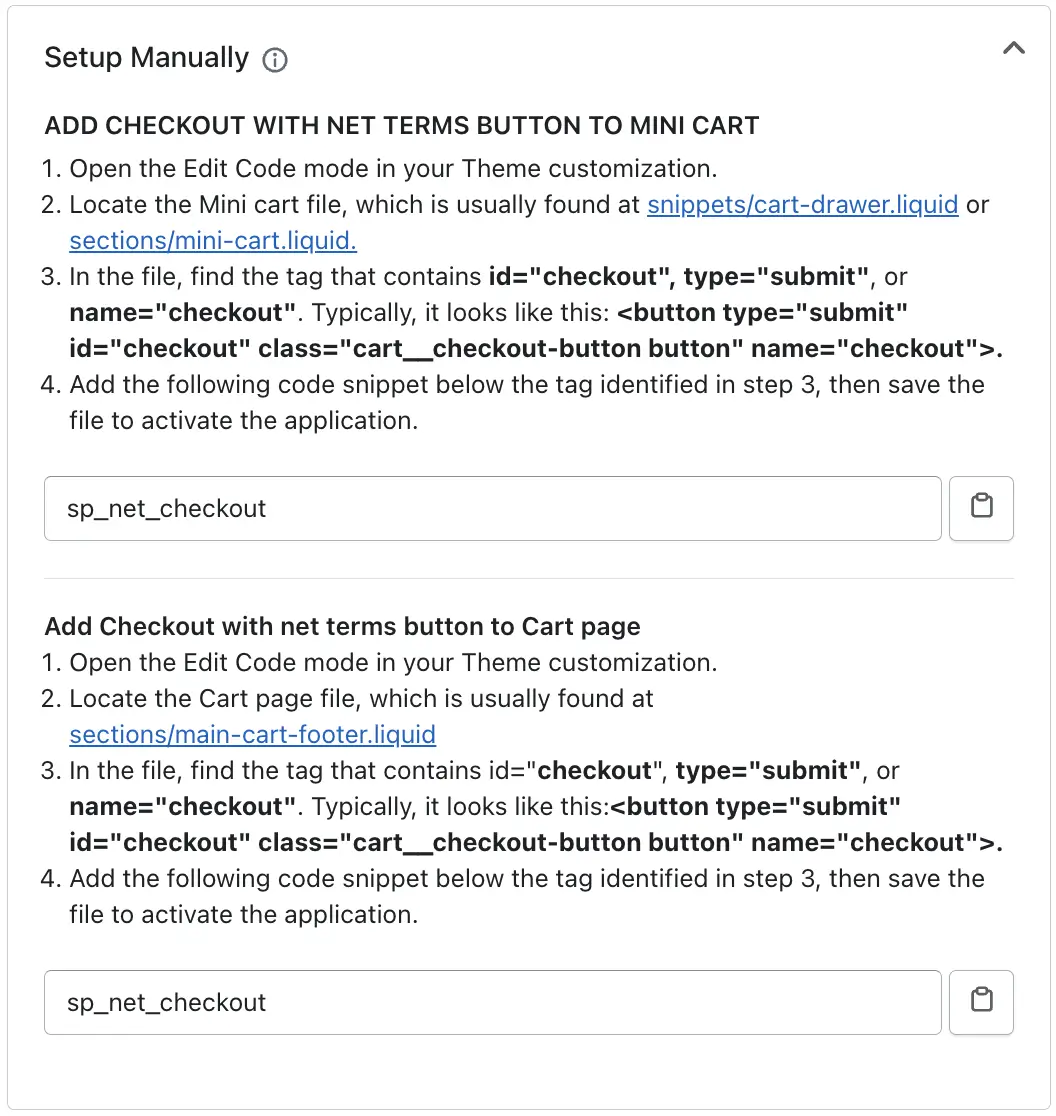
If the automatic setup does not cover all areas (like the mini cart or cart drawer), you can manually add the “Checkout with Net Terms” button.
A. Add Checkout with Net Terms Button to Mini Cart
1. Access Theme Code:
Go to your Shopify admin panel: Navigate to Online Store > Themes > Actions > Edit Code.
2. Locate Mini Cart File:
Find the mini cart file, typically named snippets/cart-drawer.liquid or sections/mini-cart.liquid.
3. Find the Checkout Button:
Look for the HTML tag that contains the checkout button. It usually has attributes like id=”checkout”, type=”submit”, or name=”checkout”.
For example:<button type="submit" id="checkout" class="cart_checkout-button button" name="checkout">
4. Add the Code Snippet:
Insert the following code snippet below the identified checkout button tag: [sp_net_checkout]
Save the file to apply the changes.
B. Add Checkout with Net Terms Button to Cart Page
1. Access Theme Code:
Go to Online Store > Themes > Actions > Edit Code.
2. Locate Cart Page File:
Find the cart page file, typically named sections/cart-template.liquid or similar.
3. Find the Checkout Button:
Look for the HTML tag that contains the checkout button. It usually has attributes like id=”checkout”, type=”submit”, or name=”checkout”.
For example:<button type="submit" id="checkout" class="cart_checkout-button button" name="checkout">
4. Add the Code Snippet:
Insert the following code snippet below the identified checkout button tag:[sp_net_checkout]
Save the file to apply the changes.
Key Notes
Automatic Setup: The app block automatically configures the button for the cart page. However, for the mini cart or cart drawer, you need to manually add the button.
Code Snippet: The [sp_net_checkout] snippet is provided by the app and ensures the “Checkout with Net Terms” button appears correctly.
Compatibility: Ensure your theme supports the app block and that there are no conflicts with custom code or other apps.
This feature allows you to customize the “Checkout with Net Terms” button to ensure it aligns with your store’s branding, theme, and language. A well-designed button can improve user experience and encourage customers to use the net payment option.
1. Text:
This is the text that will appear on the button. You can change it to match your store’s language or branding.
For example, you could use phrases like “Pay Later” or “Net 30 Checkout” depending on your target audience.
2. Button Text Color:
This is the color of the text displayed on the button. The default color is a light shade (#fffcfc), but you can change it to any color that contrasts well with the button’s background color for better visibility.
3. Button Background Color:
This is the background color of the button. The default color is a dark shade (#0f0f0f), but you can customize it to match your store’s color scheme or branding.

Offer Type
The “Offer Type” setting determines which types of offers or pricing models the net payment terms will be applicable to. This ensures that the net payment terms are only applied to specific types of transactions, depending on your business needs.
1. Volume:
This option applies net payment terms to volume-based pricing, where customers receive discounts based on the quantity of products they purchase.
If a customer buys in bulk (e.g., 100 units), they can use net payment terms to pay later.
2. Wholesale:
This option applies net payment terms to wholesale pricing, which is typically offered to retailers or resellers who purchase large quantities at discounted rates.
A retailer buying products at wholesale prices can use net payment terms to manage cash flow.
3. B2B (Business-to-Business):
This option applies net payment terms to B2B transactions, where businesses purchase products for their operations or resale.
A business customer buying supplies for their company can use net payment terms to pay within any day.
4. D2C (Direct-to-Consumer):
This option applies net payment terms to direct-to-consumer transactions, where individual customers purchase products directly from your store.
A consumer buying a high-value item can use net payment terms to pay in installments or at a later date.
5. Use with or Without Any Offer:
This is the default option. If no specific offer type is selected, the net payment terms will be applicable to all transactions, regardless of the pricing model or offer type.
If you want net payment terms to be available universally, you can leave this option selected.
How It Works
You can select one or more offer types (e.g., Volume, Wholesale, B2B, D2C) to which the net payment terms will apply.
If no option is selected, the app will default to “Use with or Without Any Offer,” meaning the net payment terms will be available for all transactions, regardless of the offer type.

Customer Tag
The “Customer Tag” option enables you to assign net payment terms to specific customers by tagging them in your Shopify store. This ensures that only tagged customers (e.g., wholesale buyers, B2B clients, or loyal customers) can access the net payment terms during checkout.
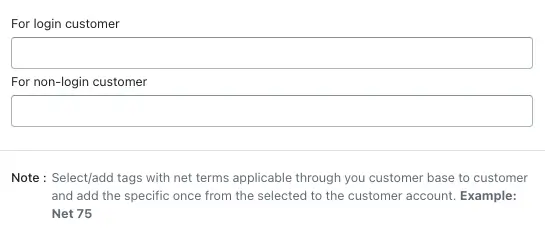
In the Net Payment Method settings, you can specify which tags are eligible for net payment terms.
For example, if you tag a customer as “Net 30”, they will be able to see and use the Net 30 payment option during checkout.
You can choose from predefined net terms such as Net 7, Net 15, Net 30, Net 45, or Net 60.
You can also create custom net terms (e.g., Net 75) for specific customers by assigning unique tags.
1. For Login Customers:
Net payment terms can be applied to customers who are logged into their accounts. This is useful for B2B or wholesale customers who have registered accounts.
2. For Non-Login Customers:
Net payment terms can also be applied to customers who are not logged in (e.g., guest checkout). However, this is less common in B2B scenarios and may require additional verification.
-> This feature allows you to specify when the payment is due. For example:
Net 7: Payment is due 7 days after the order is fulfilled.
Net 30: Payment is due 30 days after the order is fulfilled.
Logged-in customers can select one or more net terms to offer to your tagged customers. However, non-logged-in customers can use only one tag.
-> If no tags are specified, the app will not restrict net payment terms to specific customers.
-> You can assign multiple tags to a customer if they qualify for different payment terms.
Shipping & Thank You Page setting
This option enables you to choose between using Shopify’s default pages or custom-designed pages for the Shipping and Thank You sections of the checkout process. The Shipping & Thank You Page settings are applicable based on the order type.
If you use a draft order, the shipping and thank-you page will be displayed on either the Shopify page or our app page, depending on your settings.
If you use a final order, only our shipping and thank-you page will be displayed as per the custom settings.
1. Shopify Settings:
This option uses Shopify’s native (default) Shipping and Thank You pages.
If you prefer to keep the standard Shopify checkout experience without any customization, you can select this option. The pages will follow Shopify’s default design and layout.
2. Custom Settings:
This option allows you to use custom-designed Shipping and Thank You pages provided by the app.
Additional Information:
On our Shipping page, the Shopify delivery method will be displayed based on the Shopify settings you have configured for shipping. Shipping charges and taxes will be applied according to Shopify settings on our app’s shipping page.

Order type setting
It determines whether customers can check out without providing a shipping address. This setting helps define how the order is processed.
Enable “Allow customer to complete the order without a shipping address”
- This option applies only to the Final Order type.
- If enabled (checked), customers can place an order without entering a shipping address.
- When they proceed to checkout without a shipping address, the system will create a Draft Order instead of a Normal Order.
Disable “Allow customer to complete the order without a shipping address”

Cart setting
Clear cart when an order is placed using net payment terms:
This option ensures that once an order is successfully placed with net payment terms, the items in the customer’s shopping cart are automatically cleared. This can help prevent confusion or duplicate orders, as the customer will start with an empty cart for their next purchase.

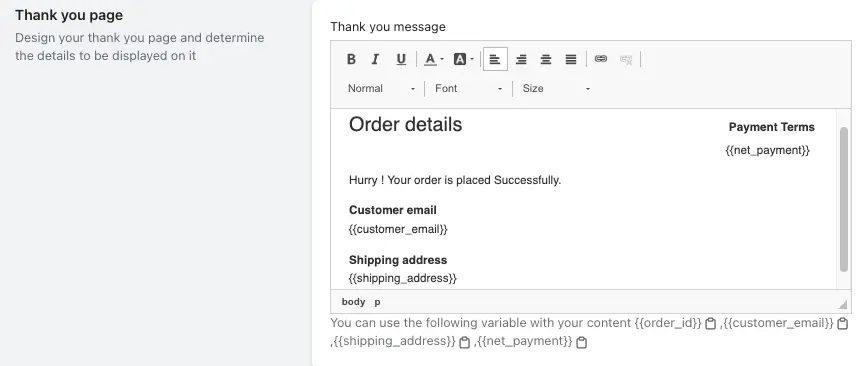
Thank you page
This option allows merchants to customize the thank you page that customers see after placing an order using net payment terms. This page can be designed to display specific details and messages that enhance the customer experience and provide important information about their order.
Merchants can create a personalized message to thank customers for their purchase. This message can be formatted with different fonts, sizes, and styles (bold, italic, underline) to match the brand’s aesthetic.
Merchants can use variables like {order_id}, {customer_email}, {shipping_address}, and {net_payment} to dynamically insert specific order details into the thank you message. This ensures that each customer receives a personalized and accurate confirmation of their purchase.
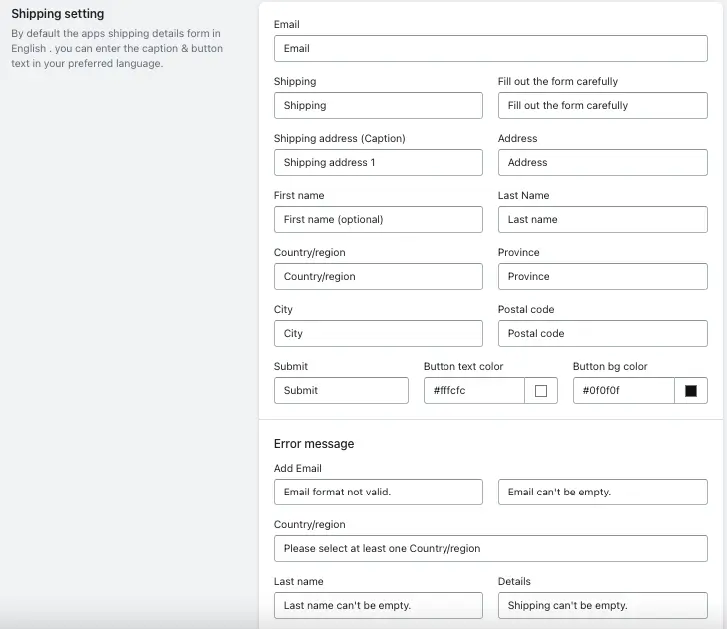
Shipping setting
This feature allows merchants to customize the shipping details form that customers fill out when placing an order. This feature ensures that the shipping information is collected accurately and in a language preferred by the merchant or customer. Here are the key aspects of the “Shipping settings” option:
1. Language Customization:
By default, the shipping details form is in English, but merchants can customize the captions and button text in their preferred language to better serve their customer base.
2. Form Fields:
The form includes various fields for collecting essential shipping information, such as:
Email: To ensure communication regarding the order.
Shipping Address: Including address lines, city, postal code, and country/region.
Name Fields: First name and last name, with the option to make the first name optional.
Province and Postal Code: For more specific location details.
3. Submit Button Customization:
Merchants can customize the appearance of the submit button by changing the text color and background color to match their brand’s design.
4. Error Messages:
The settings allow for the customization of error messages to guide customers when they fill out the form incorrectly. Examples include:
Email: Notifications for invalid email formats or empty email fields.
Country/Region: Reminders to select at least one country or region.
Last Name and Shipping Address: Alerts if these fields are left empty.
-> By customizing the shipping settings, merchants can ensure a smoother and more user-friendly checkout process, which is crucial for maintaining customer satisfaction and reducing errors in order fulfillment.
App proxy
This option allows merchants to integrate the app more seamlessly with their Shopify store by using a proxy subpath. This feature is particularly useful for embedding app content directly within the merchant’s Shopify storefront, providing a more cohesive user experience.
App Proxy Subpath:
This is a URL path that the app uses to serve content through the merchant’s Shopify store. For example, if the subpath is set to “wholesale,” the app content can be accessed via a URL like “yourstore.myshopify.com/wholesale“.

The note in the file content emphasizes the importance of contacting the app’s support team before making any changes to the app URL. This ensures that any modifications are done correctly and do not negatively impact the store’s operations.