![How to setup a facebook channel on shopify [2022] How to setup a facebook channel on shopify [2022]](https://www.identixweb.com/wp-content/uploads/2022/06/How-to-setup-a-facebook-channel-on-shopify-2022.png)
As Shopify continues to grow as a product, more and more merchants are using Facebook to advertise. Facebook has become an ever more important network to reach a large target audience. Ever wondered how to set up a Facebook channel on the Shopify store?
If you haven’t already, be sure to check out the Facebook channel from your Shopify admin. You can sync your products to a catalog on Facebook by which you can sell on Facebook. The Facebook channel also makes it easy for you to create marketing activities directly from Shopify. This blog will cover the steps to set up a Facebook channel and connect it with Shopify.
What is a Facebook sales channel?
The Facebook channel allows you to sell on both Facebook and Instagram. It also gives you important insights about the performance of your ads and customers. You can only use the Facebook channel if your online store is on the basic Shopify plan or higher.
To start using the Facebook channel you need to set up a Facebook Business Manager that’s connected to both your business’s Facebook page and ad account that has an admin role for the Business Manager.
To set up the Facebook channel you need to satisfy some requirements. If you meet those requirements then you can set up a Facebook channel.
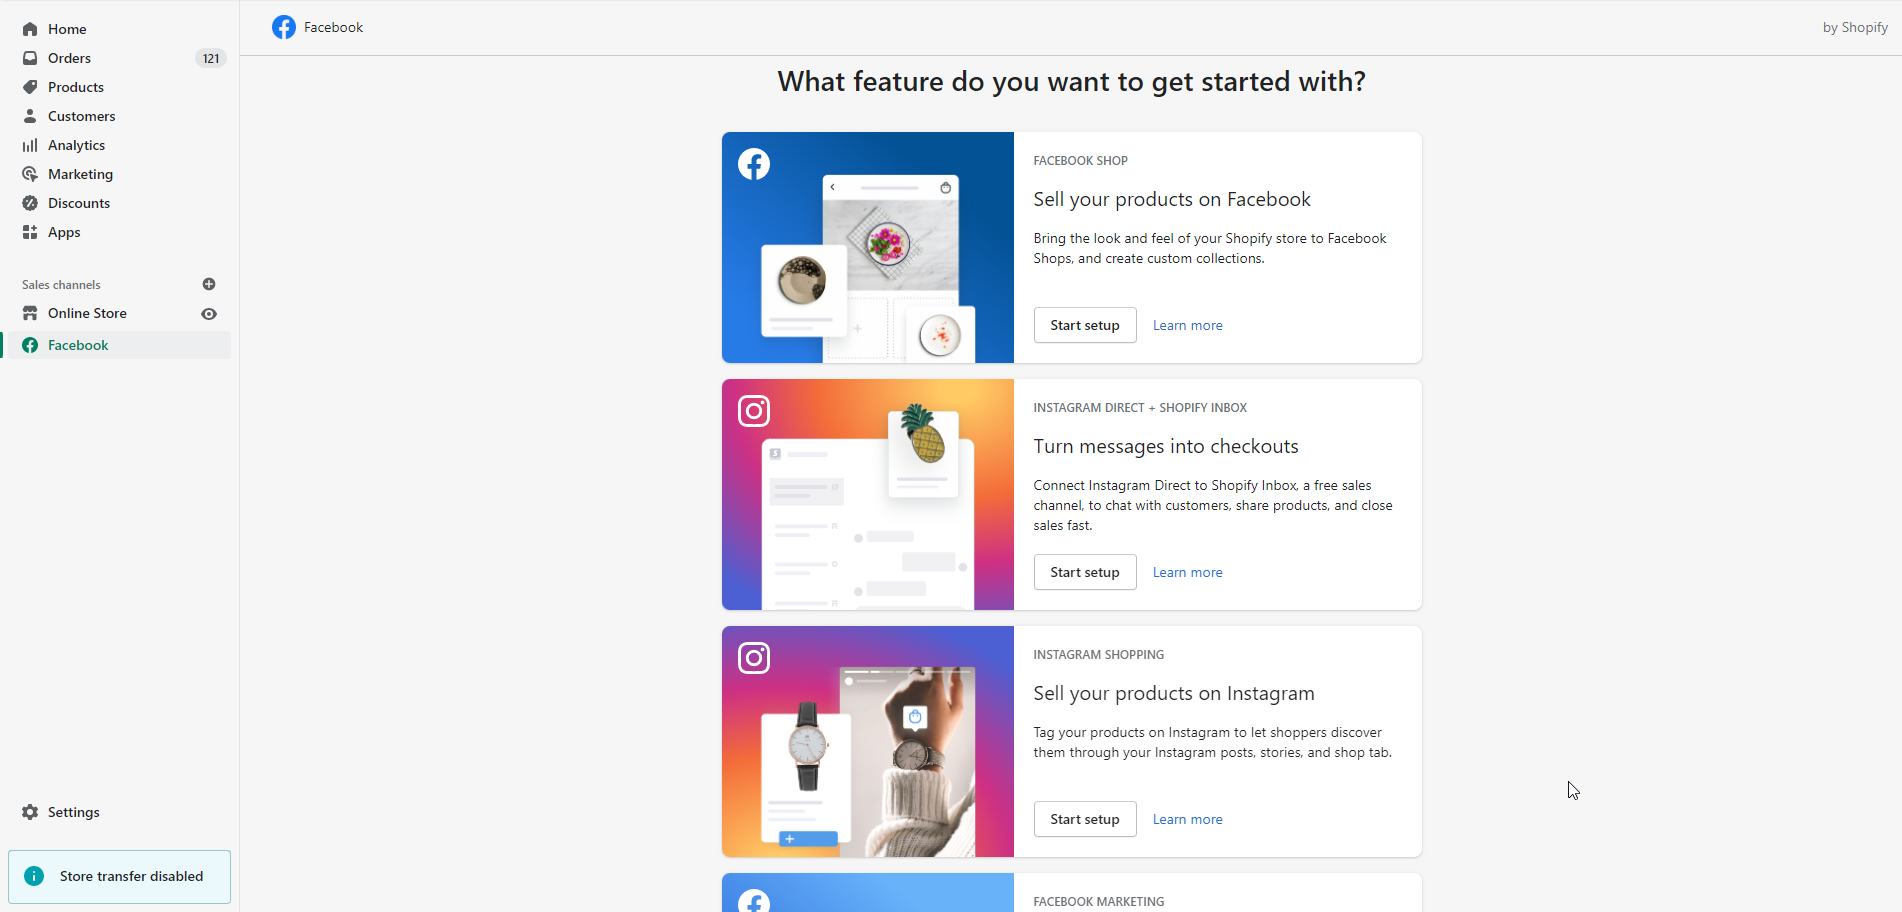
The Facebook channel helps you to grow your business with its three features:
1. Facebook shop
- Sell on the Facebook page of your business.
2. Instagram shopping
- Stores based in the US can allow their customers to checkout on Instagram.
3. Facebook marketing
- Set up Facebook marketing.
- Create a Facebook pixel and add it to your Facebook channel.
- Select Facebook’s customer data-sharing level and know more about tracking customers using the Facebook Conversion API.
Steps to set up the Facebook channel
You need to set up a Facebook channel to start selling on Facebook. Here are the steps to set up the Facebook channel.
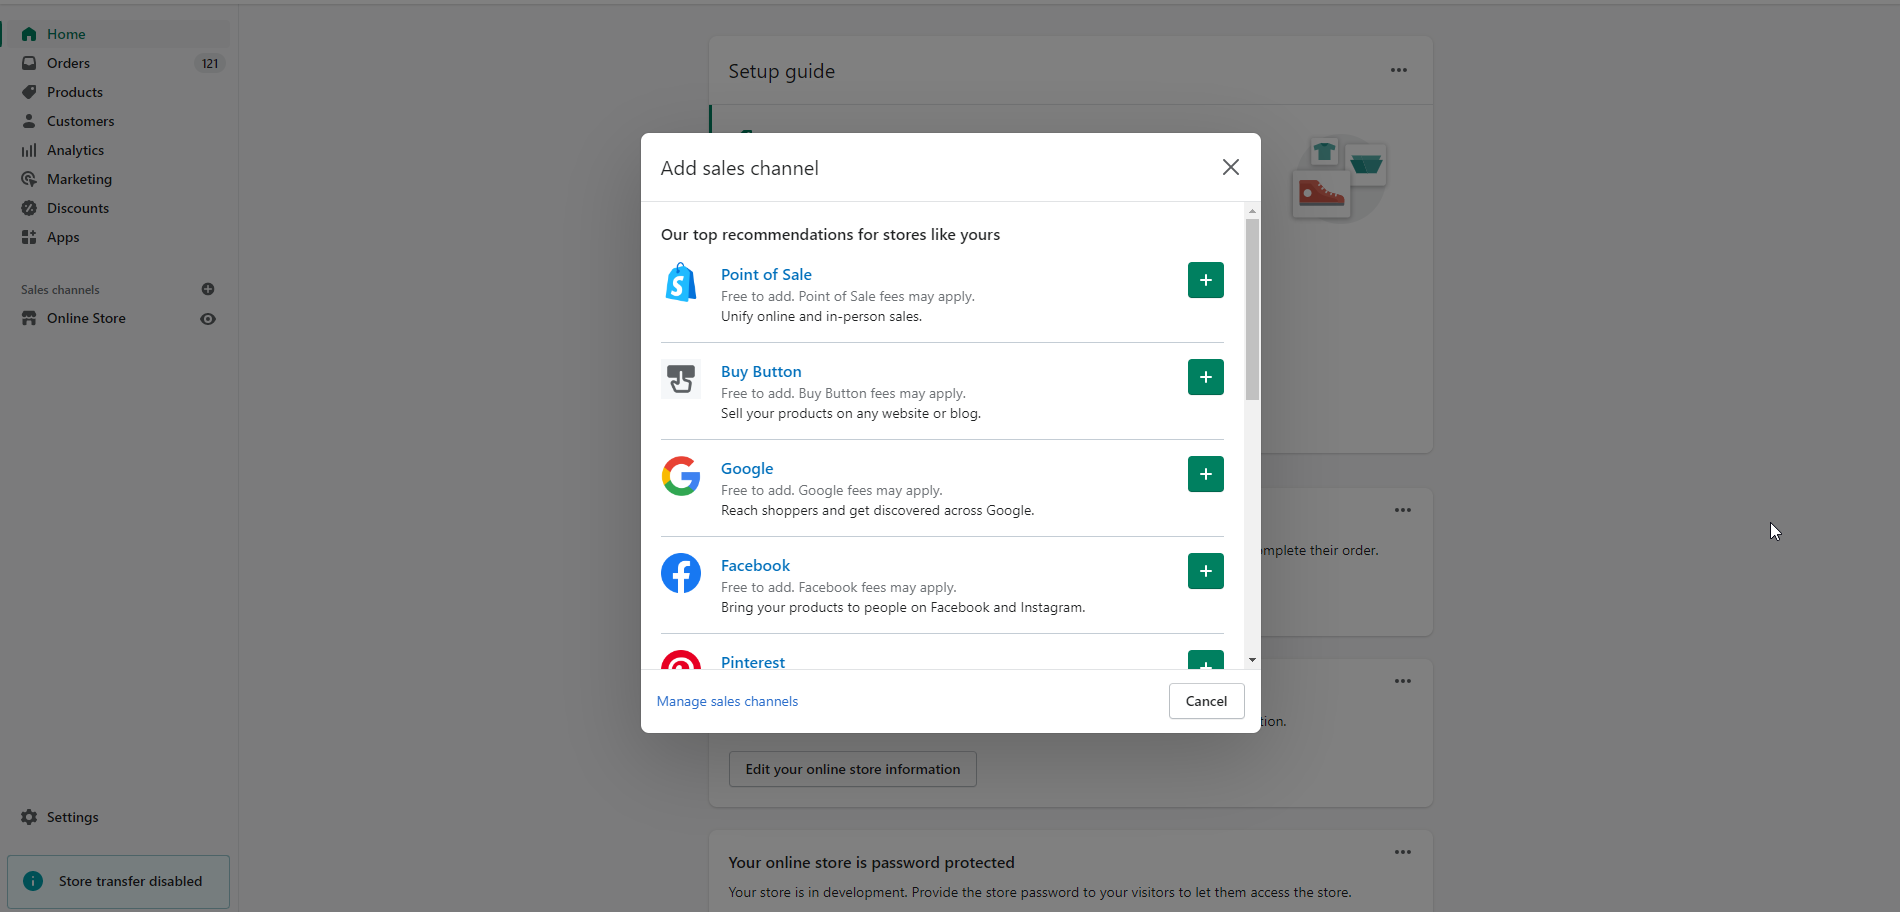
Step 1: Login to your Shopify admin and click + next to SALES CHANNELS.
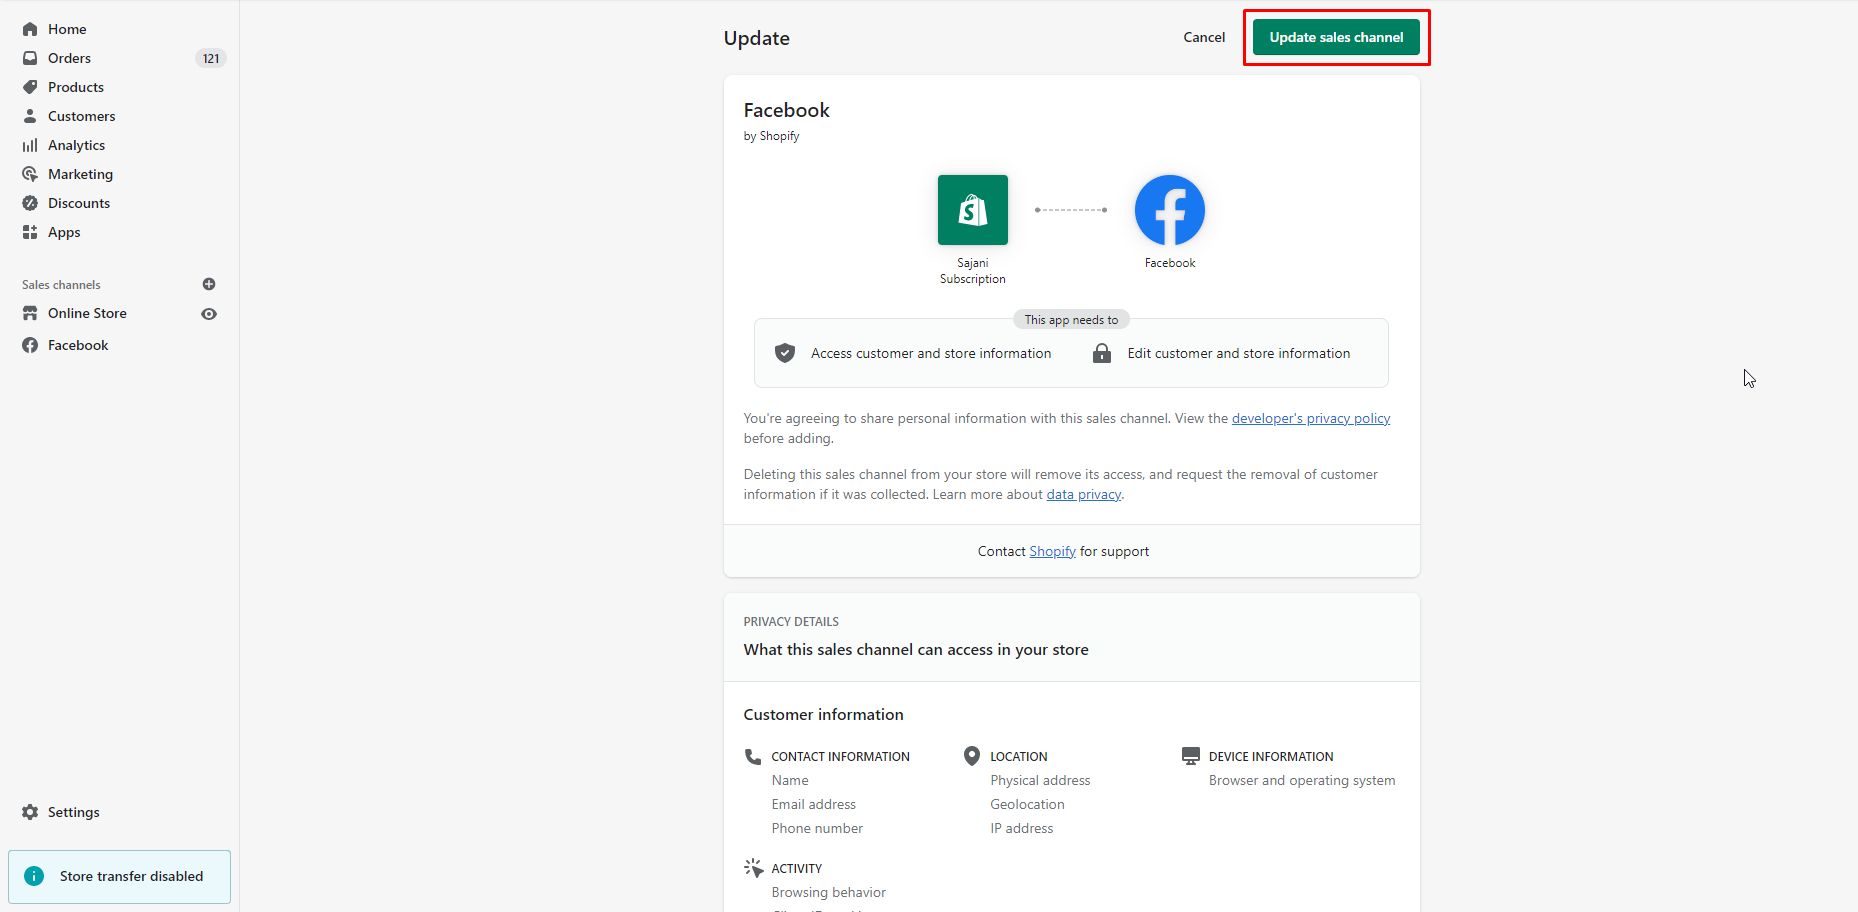
Step 2: To install the Facebook channel, click + next to Facebook and then click Update sales channel.
Step 3: Click Start set up on the feature that you want to install first.
Step 4: Click on Connect account.
Step 5: Log in to your Facebook account.
Step 6: Connect the Facebook assets that are required to set up the features that you want.
Step 7: Accept the terms and conditions.
Step 8: Click on Finish setup.
How to publish Shopify products on Facebook?
- To publish products on Facebook first of all you need to add products in your Shopify store.
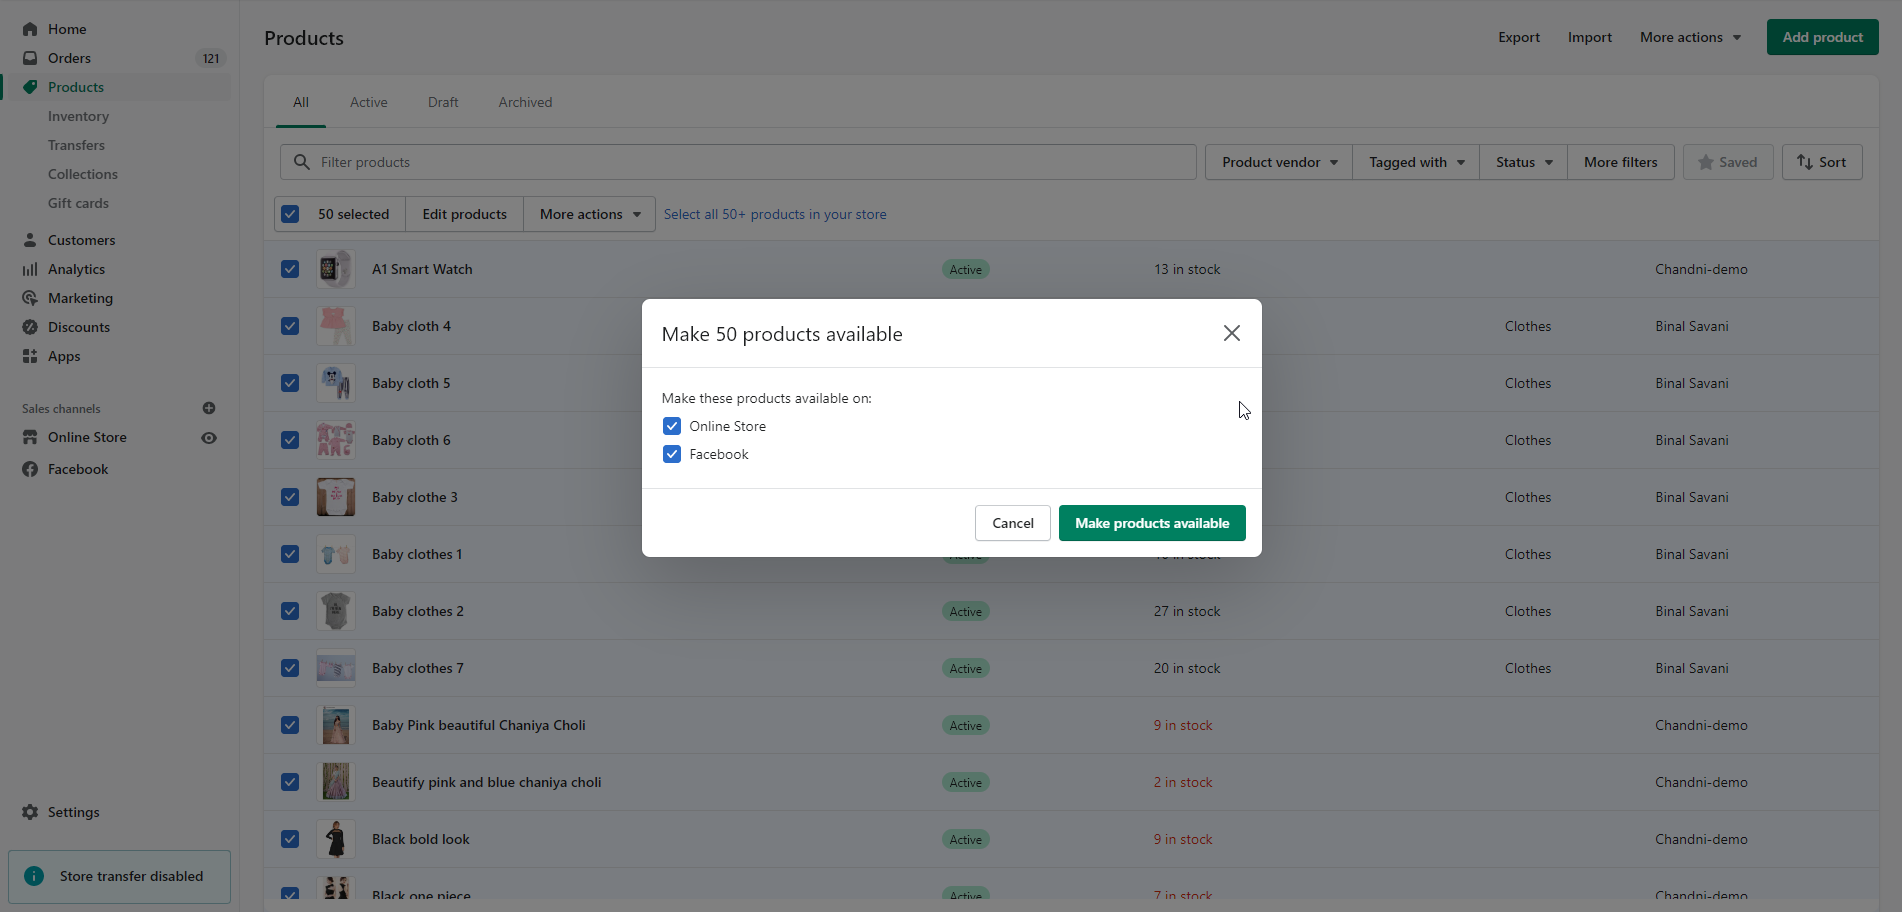
- If you have already added products in your store but they are not available to Facebook, then select the products > more actions and click on Make products available.
- Click the name of the product that you want to show on your Facebook Shop section.
- Click on Manage, from the sales channel section of the product details page.
- In the Manage sales channels availability dialog, check Facebook, and then click Done.




About the author
Sajini Annie John
Meet Sajini, a seasoned technical content writer with a passion for e-commerce and expertise in Shopify. She is committed to helping online businesses to thrive through the power of well-crafted content.