Welcome to the detailed guide of Wholesale Pricing app – a complete solution to provide customized wholesale pricing and volume discount on bulk orders for B2B and D2C customers.
If you are looking to increase your profit margin, wholesale business can be a game changer. In this guide, we will guide you everything from onboarding process to setup of this app in your online store. If you haven’t installed the Wholesale Hero & B2B Pricing app, click the link to get installed and get started.
Onboarding Process
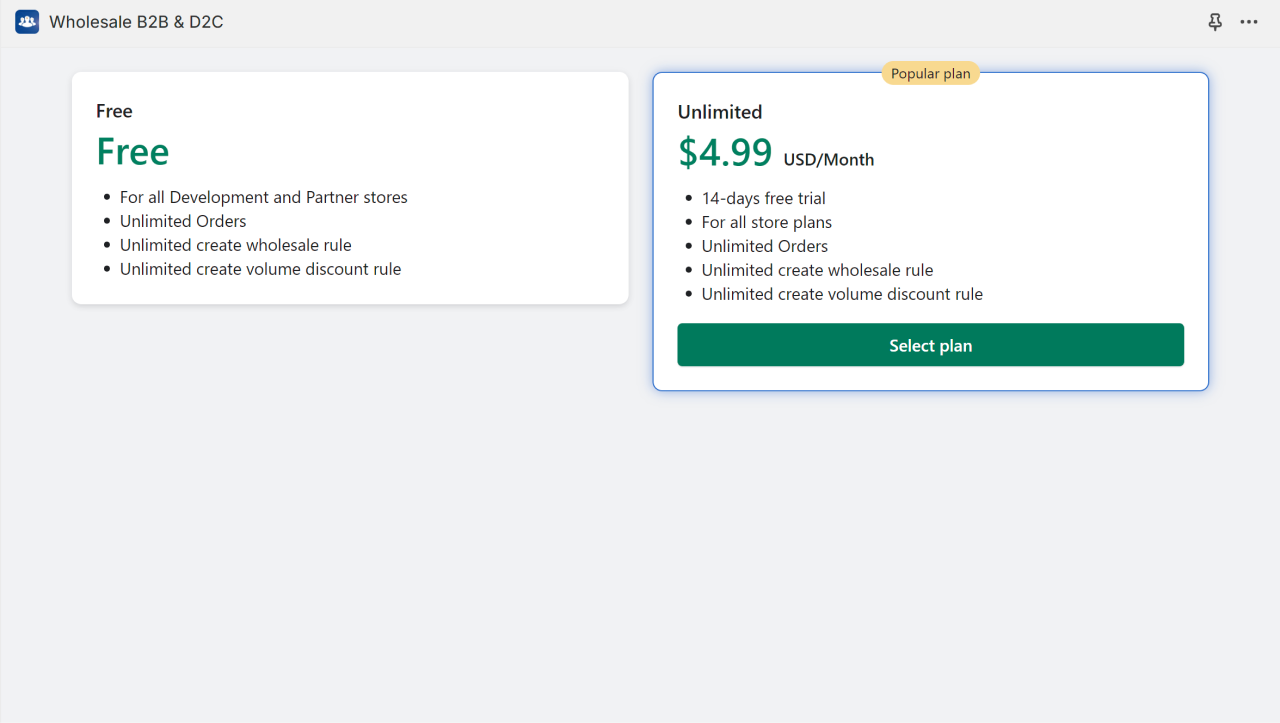
After installing the app in your Shopify store, the first page that you will see is pricing plan page as shown below. Select the plan.
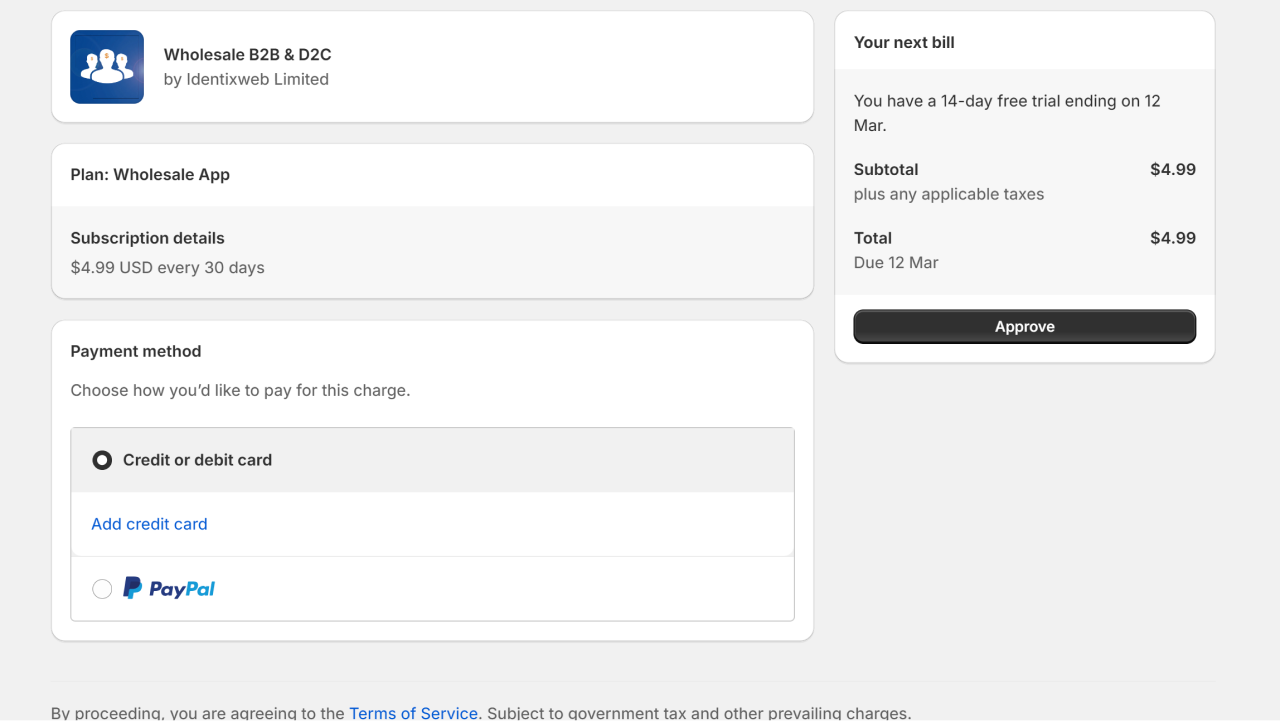
The next page is charge approval page as shown below. On this page click on the Approve button.
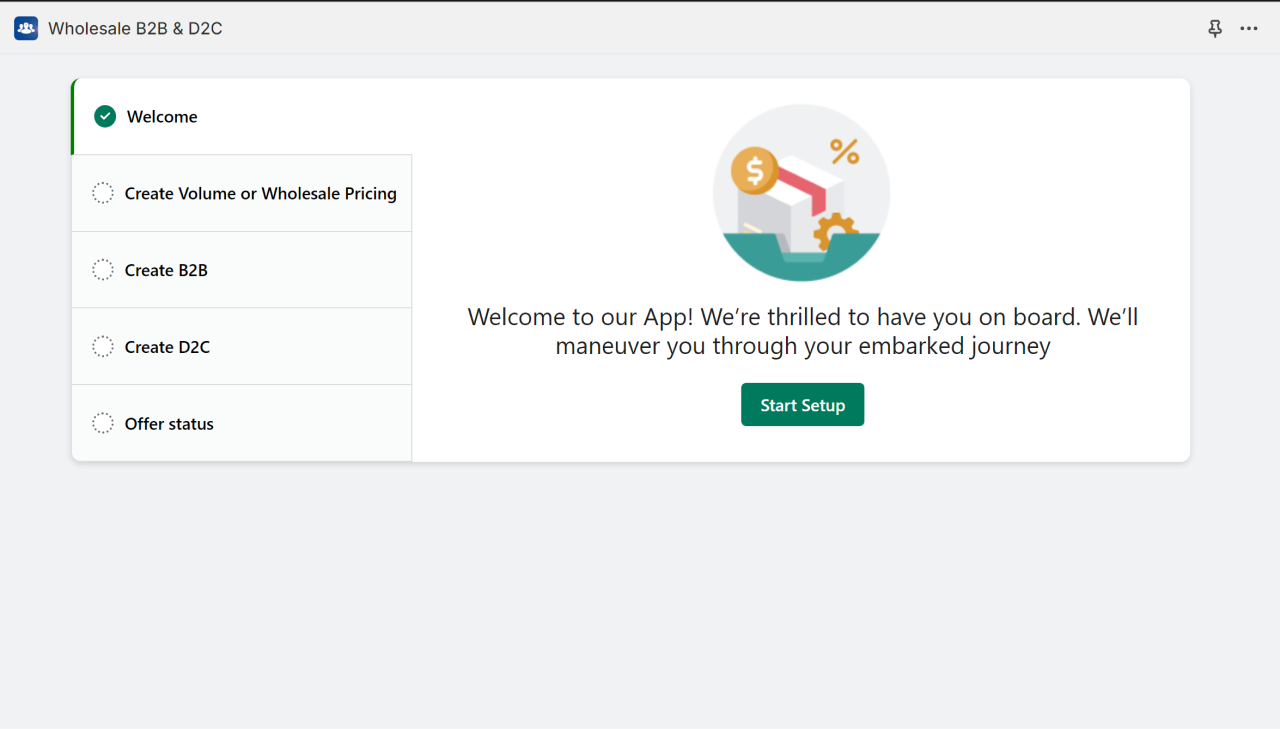
Now next step is the app setup stage. Click on Start Setup button as shown below.
In second step either you can create the offer or you can skip this step.
The next step is to create a B2B offer. If you want to create the offer at this stage then click on the Create offer button and if you want to do it later then click on the Skip button.
Let’s create B2B offer now. In B2B offer, first you need to create the company and catalog. Click on Create company button as shown below.
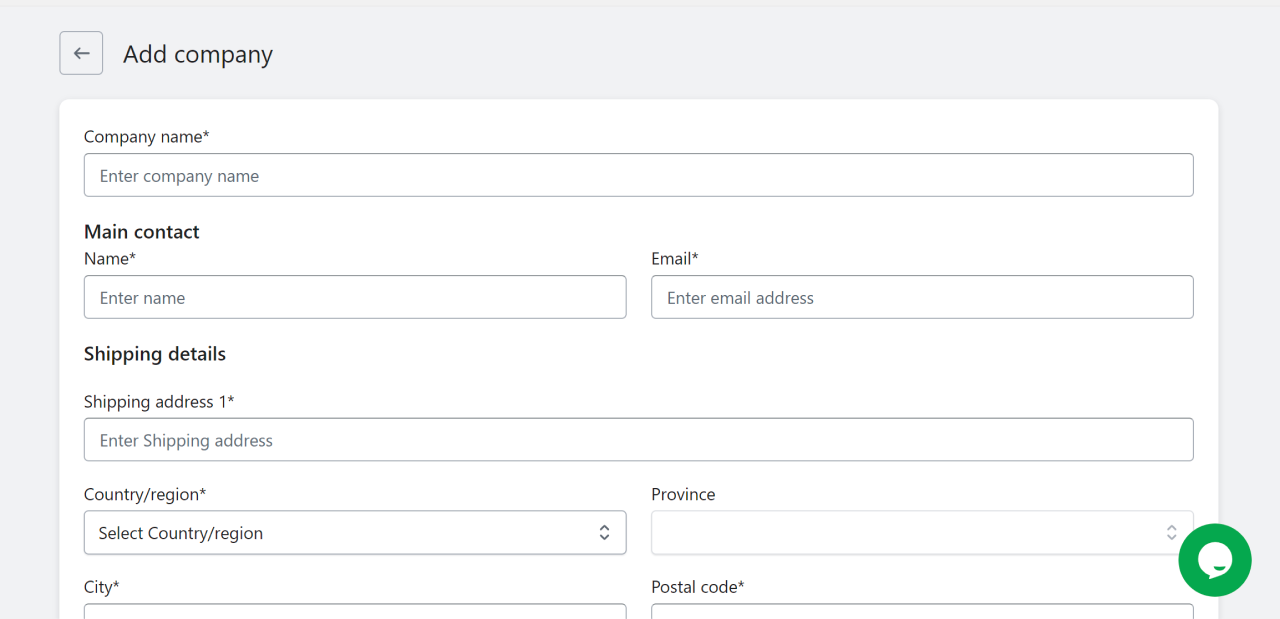
Now, on the next page, you need to enter your company name, shipping details and customers. After adding the details hit the Save button to save your data.
Now let’s create the Catalog using the Create catalog button as shown below. You have to add the products that you want to include in the catalog. After adding the catalog click on the Save button.
Next step is to create the D2C offer. If you want to create the offer at this stage then click on the Create offer button and if you want to do it later then click on the Skip button. To create a D2C offer you must add a catalog.

Now last step is to enable the app to get started. Click on the Enable app button.
After completing all the onboarding steps you will land to the dashboard where you can see the app status, analytics and your offers.
From the left panel, the next page is offer listing page where you can see all your offers that have been created by you. If you want to create a new offer then you can create it by clicking on the Create offer button shown on this page. You can see the priority of offers that you have added and there are other options like:
Disable: To disable the offer
Duplicate: To create a duplicate of the offer
Edit: To edit any details in the offer
Delete: To delete an offer
Company
On this page, you can see the list of company that you have created with number of users. You can edit the details or delete the company using the edit and delete icons as shown below.
Catalog
On this page, you can see the list of catalogs that you have created with specific company assigned to them. You can create a duplicate of the catalog, edit the details or delete the catalog using the icons as shown below.
Now let’s see how to create offers like volume discount, wholesale offer, B2B & D2C offer in detail:
How to create a volume discount offer?
Open offers page and you will see the option offer type in which you have to select Volume. Let’s see each field given on that page.
Offer name: Add a name for the offer so that you identify it.
Priority: This option allows you to set the priority for each offer you create. Priority will be auto-numbered and in case if you want to assign the priority you can add it. Note that you can’t assign same priority number to more than 1 offer. Discounts will be applied based on the priority you have added to each offer.
The next section is to set the discount offer. 3 types of discounts you can create. Let’s see each of these options:
Percentage: This will apply a percentage of discount on the product price.
For instance, if you want to offer a 20% discount on a purchase of 10 items, you can specify the quantity and set the discount at 20% in percentage.
On the other side, if you wish to provide different discounts for different quantity ranges, you can set up multiple slabs.
Let’s say the price of a product is $100. You can add a range like: from 1 to 10 items give a discount of 5%, 11-20 items give a discount of 10%. So, if customers purchases 1 to 10 items then they will get 5% discount which means the price of products will be $95 per item.
Amount: Amount added in sell price field will be applied as your final sell price of product.
For example, product price is $100. You can add a range like: from 1 to 10 items give a discount of $95. So, if customers purchases 1 to 10 items then they will have to pay the amount by considering $95 per item.
Flat-rate discount: Any value entered in “Flat discount off” is the total amount deducted from the said slab.
For example, product price is $100. You can add a range like: from 1 to 10 items give a discount of 5%. So, if customers purchases 1 to 10 items then they will have to pay the amount by considering $95 per item.
You can apply these discount offer to all products or for specific products. Apart from this 3 options are available as shown below; (1) select your customers to whom you want to give the discounts (2) cart value in which you can add condition to be satisfied by customers to get the discount (3) widget position in which you can decide the position where you want to show the offer table to your customers.
NOTE: If the user had selected a location from the location popup upon login for which discount is available/applicable and on Checkout if the user changed/selected the location where the discount is not applicable, still the customer will avail/checkout with the discounted price due to Shopify limitation.
How to create a wholesale offer?
Open offers page and you will see the option offer type in which you have to select Wholesale. Let’s see each field given on that page.
Offer name: Add a name for the offer so that you identify it.
Priority: This option allows you to set the priority for each offer you create. Discounts will be applied based on the priority you have added to each offer.
The next section is to set the discount offer. 3 types of discounts you can create. Let’s see each of these options:
Percentage: This will apply a percentage of deduction on the price of product. You can give percentage discount only on quantity of items.
For example, price of a product is $100 and you are adding the following offer:
Quantity: 10
Discount value: 10%
So if customers buys 10 items they will get it for $950 because 5% is applied on the item price.
Amount: If you want to set a selling price for the product then you can use this discount.
For example, price of a product is $100 and you are adding the following offer:
Quantity: 10
Sell price: 95
So if customers buys 10 items they will get it for $950 because 5 is deducted from the product price and only 95 is applied on the item price.
Flat-rate discount: Any value entered in “Flat discount off” is the total amount deducted from the said slab.
For example, price of a product is $100 and you are adding the following offer:
Quantity: 10
Flat discount off: 10
So if customers buys 10 items they will get it for $990 because $10 is deducted from the total.
You can apply these discount offer to all products or for specific products. Apart from this 3 options are available as shown below; (1) select your customers to whom you want to give the discounts (2) cart value in which you can add condition to be satisfied by customers to get the discount (3) widget position in which you can decide the position where you want to show the offer for your customers.
NOTE: If the user had selected a location from the location popup upon login for which discount is available/applicable and on Checkout if the user changed/selected the location where the discount is not applicable, still the customer will avail/checkout with the discounted price due to Shopify limitation.
How to create a B2B offer?
Open offers page and you will see the option offer type in which you have to select B2B. Let’s see each field given on that page.
Offer name: Add a name for the offer so that you identify it.
Priority: This option allows you to set the priority for each offer you create. Discounts will be applied based on the priority you have added to each offer.
Next option is to select the company and catalog to which you want to give the offer. Rest all options are same as seen in above offer types.
For B2B customers, upon login to your website the customer has to select at least one location, and based on that product discounts will be displayed.
NOTE: If the user had selected a location from the location popup upon login for which discount is available/applicable and on Checkout if the user changed/selected the location where the discount is not applicable, still the customer will avail/checkout with the discounted price due to Shopify limitation.
How to create a D2C offer?
Open offers page and you will see the option offer type in which you have to select D2C. Let’s see each field given on that page.
Offer name: Add a name for the offer so that you identify it.
Priority: This option allows you to set the priority for each offer you create. Discounts will be applied based on the priority you have added to each offer.
Select the customers and catalog to whom you want to give the discount. Rest options are same as explained above in other discounts.
NOTE: If the user had selected a location from the location popup upon login for which discount is available/applicable and on Checkout if the user changed/selected the location where the discount is not applicable, still the customer will avail/checkout with the discounted price due to Shopify limitation.
After doing all the changes click on the Save button to save changes. To know more about this app read our helpdesk.
If you’re looking for more options to improve your wholesale business, check out these Best Shopify wholesale apps that can further enhance your store’s efficiency.






About the author
Sajini Annie John
Meet Sajini, a seasoned technical content writer with a passion for e-commerce and expertise in Shopify. She is committed to helping online businesses to thrive through the power of well-crafted content.