
Showing an Estimated Delivery Date on your Shopify product pages is a great way to let customers know when they can expect to receive their orders. This transparency helps customers make informed decisions before purchasing and reduces frustration caused by unexpected delays.
This guide will explore simple and effective methods for adding an EDD and time with Date Picker to your Shopify product pages. Let’s get started!
What is An Estimated Delivery Date and Time?
An Estimated Delivery Date and Time is the projected timeframe in which a customer can expect to receive their order after making a purchase. It approximates when the order will arrive, helping to set realistic expectations for delivery and ensuring transparency.
Why Show an Estimated Delivery Date and Time?
Displaying an EDD is important for enhancing the customer experience on your Shopify store. Here’s why it matters:
Builds Trust
Customers value transparency, especially when it comes to delivery. You set clear expectations by showing them when they can expect their order, which fosters trust.
Reduces Cart Abandonment
When buyers know when their order will arrive, they are more likely to purchase, which helps reduce hesitations at checkout.
Prevents Frustration
Unexpected delays or long wait times can cause significant frustration for customers, especially when they are not informed upfront. By providing a clear EDD on your product or checkout pages, you ensure customers know any potential wait times before placing their orders.
Improves Customer Satisfaction
Clear delivery timelines create a more satisfying shopping experience. Happy customers are more likely to return, leave positive reviews, and recommend your store to others.
What is a Date Picker on Product Pages?
A Date Picker lets customers choose their preferred delivery or pickup date directly on the product page.
Why Show a Date Picker?
Offers Flexibility
Customers can select a delivery date and time that fits their schedule, ensuring a more convenient shopping experience.
Supports Shipping, Local Delivery and Store Pickup
Customers can choose shipping for the convenience of home delivery. Those who want to save on delivery fees or get their items faster can opt for local delivery or in-store pickup.
Enhances Convenience
Offering a date picker is especially useful for customers buying gifts. It ensures that gifts arrive on time for special occasions, like birthdays or holidays. This convenience eliminates uncertainty and builds trust, allowing shoppers to plan and feel confident in their purchases.
Increases Conversions
Offering features like date picker boosts sales by giving customers control over their preferences. Clear timelines reduce uncertainty, build confidence, and encourage shoppers to complete their purchases, ultimately driving higher conversions and customer loyalty.
Ready to enhance your e-commerce delivery? Learn everything about Shopify Delivery Date Picker!
Why You Should Add Both to Your Shopify Product Page?
Combining an Estimated Delivery Date & Time with a Date Picker provides the best of both worlds:
- Customers get clarity on when their orders will arrive.
- Shoppers can choose a delivery date that fits their schedule.
- Creating a seamless shopping experience.
- Builds customer confidence, encouraging more completed purchases.
How to Show Estimated Delivery Date & Time With Date Picker on Product Page
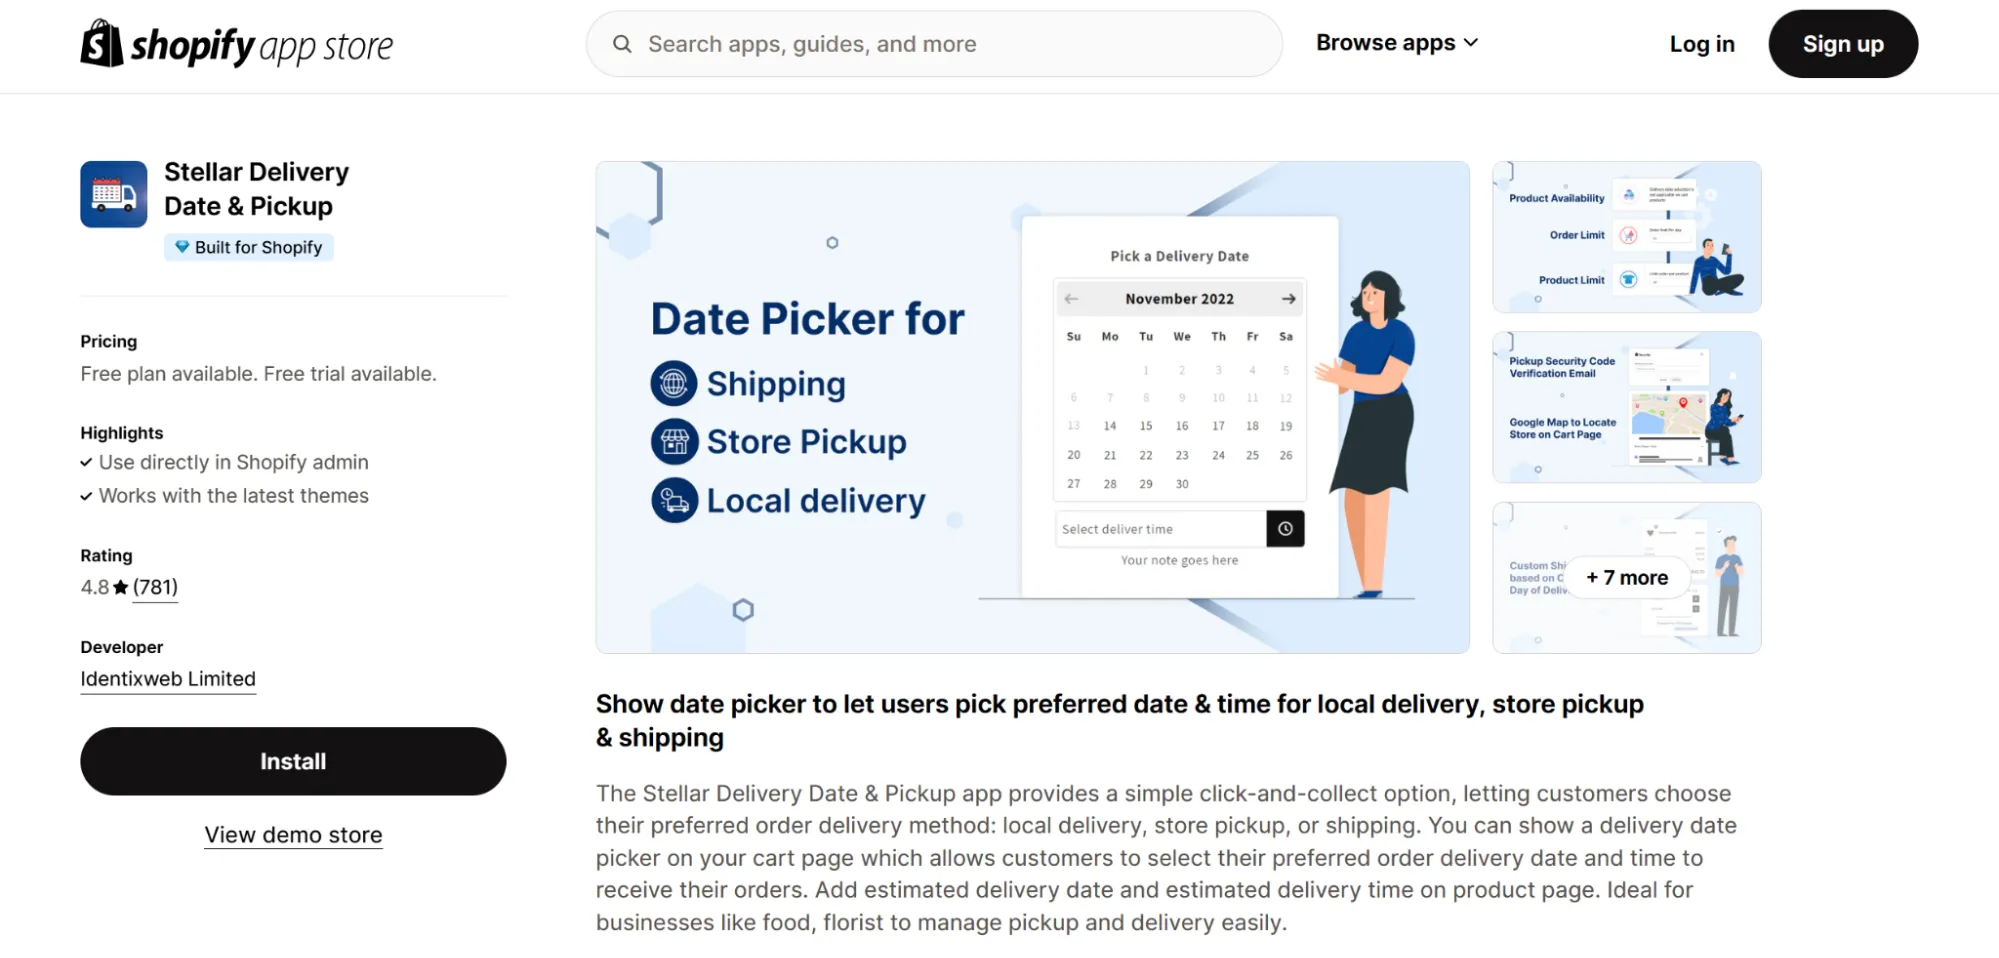
The Stellar Delivery Date & Pickup app makes adding EDD & times with a date picker to your Shopify product page simple without coding. This app offers features like:
- Displaying estimated delivery or pickup dates.
- Allowing customers to select a preferred delivery date and time.
- Configuring specific delivery rules for different products or locations.
- Easy integration with Shopify stores.
Step 1: Install the Stellar Delivery Date & Pickup App
1. Go to the Shopify App Store and search for “Stellar Delivery Date & Pickup.”
2. Click Add App and install it on your store.
Step 2: Configure Estimated Delivery Date
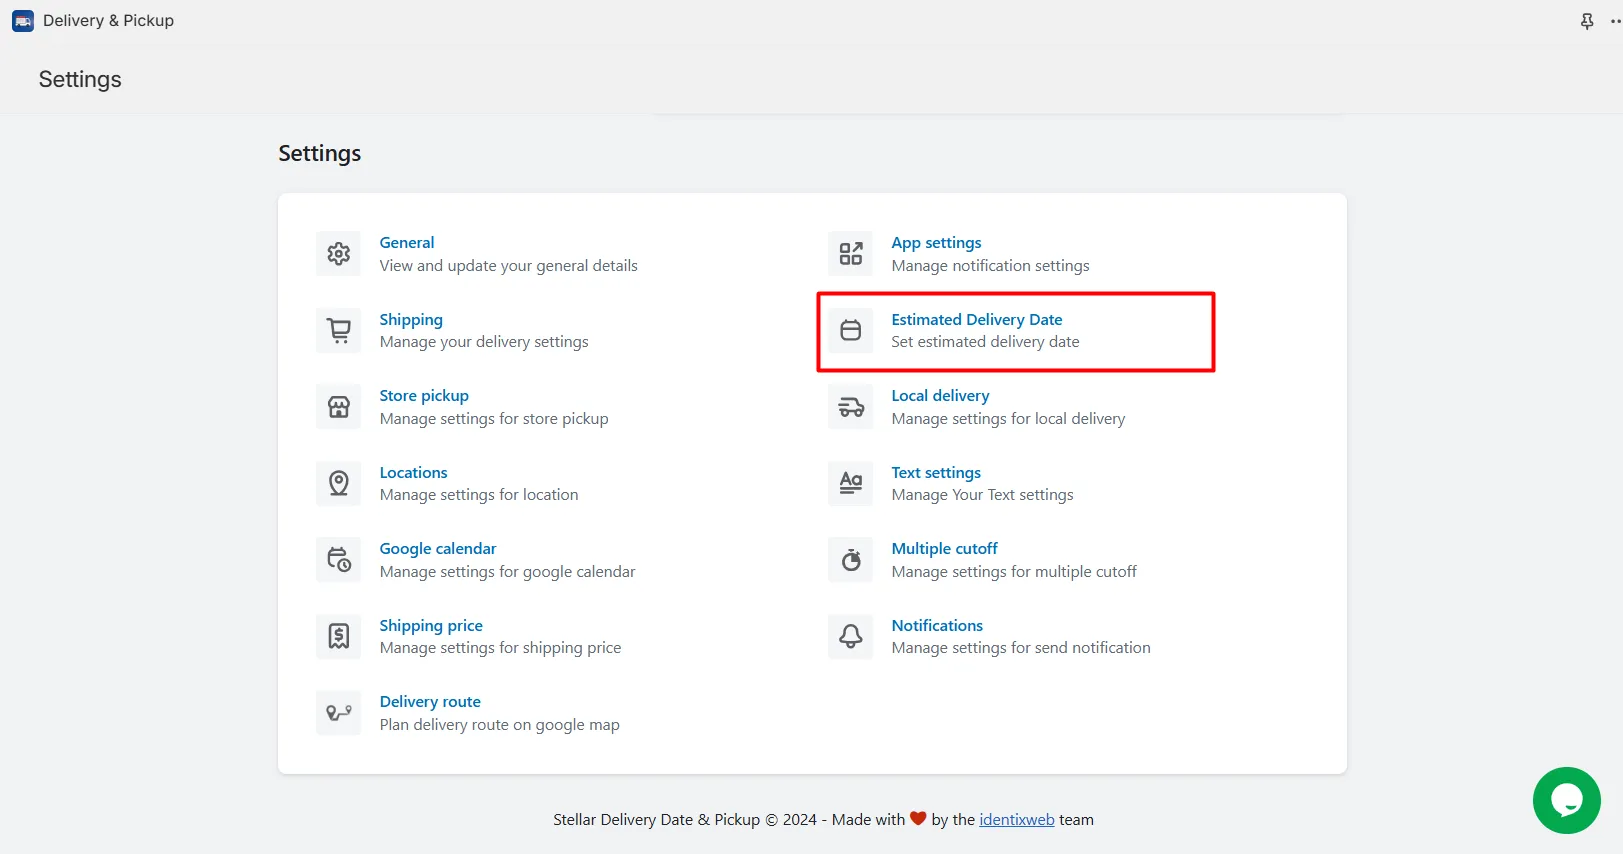
1. Open the app and go to the Delivery Settings section.
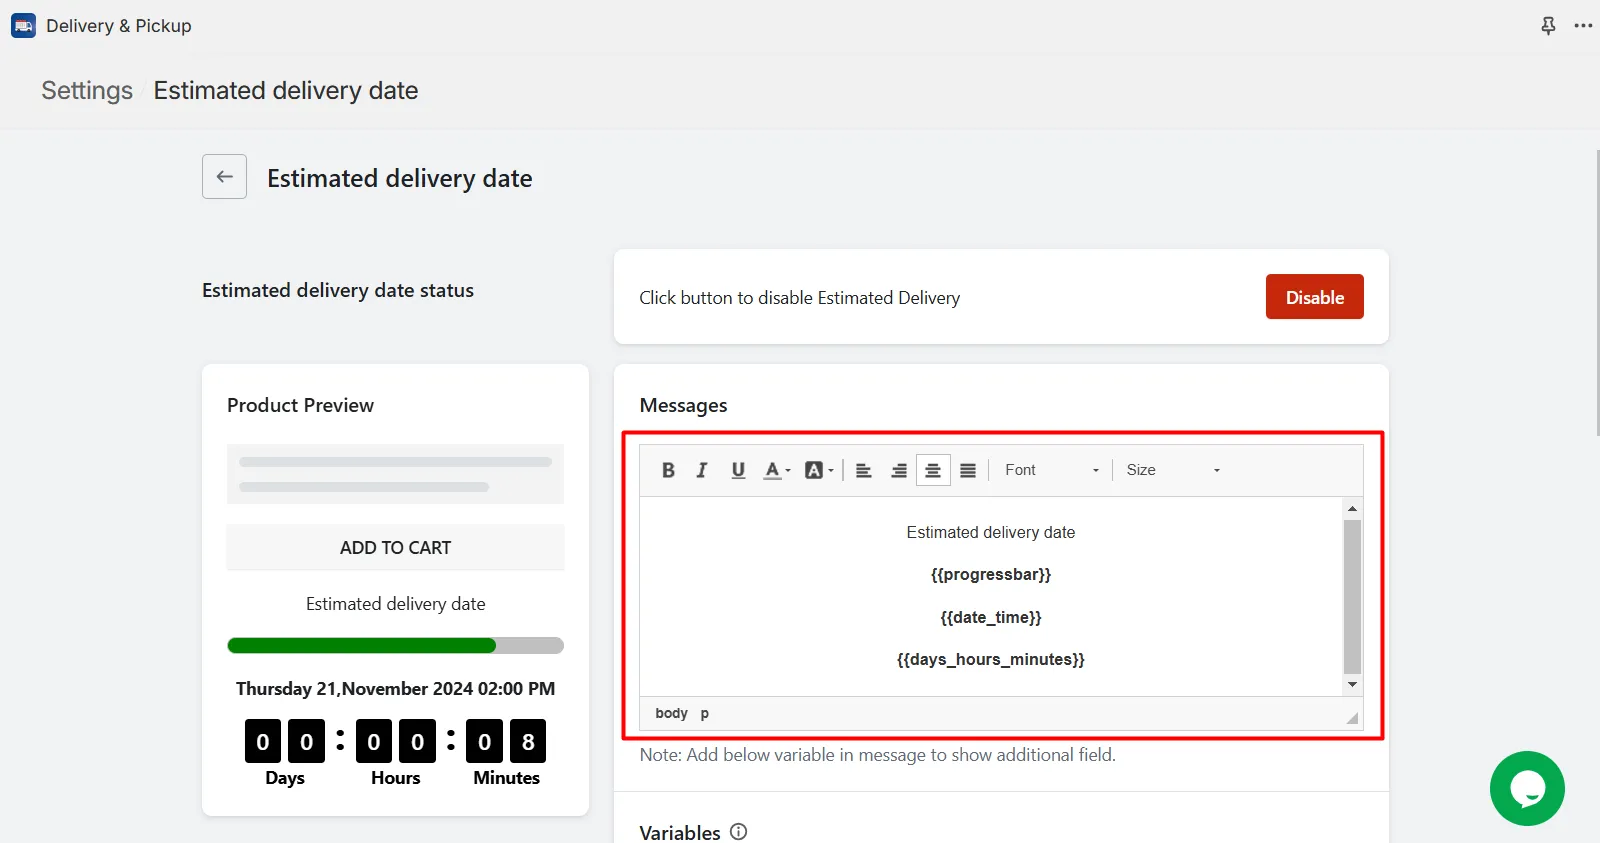
2. Select the options for EDD settings –
You can customize the message displayed for the EDD using dynamic variables:
{{days_hours_minutes}}: Shows the countdown in days, hours, and minutes.
{{days_hours}}: Displays the countdown in days and hours.
{{hours_minutes}}: Shows the countdown in hours and minutes.
{{date_time}}: Displays the exact date and time.
{{progressbar}}: Represents the countdown visually with a progress bar.
3. Display Position Options
Choose where to show the EDD on your product page:
1. Above the “Add to Cart” button
2. Below the “Add to Cart” button
4. Add-on Options for Date & Time
If you’re using Store Pickup or Local Delivery add-ons, select a default option (Shipping, Store Pickup, or Local Delivery) to display the EDD tailored to the chosen method.
Step 3: Enable the Delivery Date Picker Feature
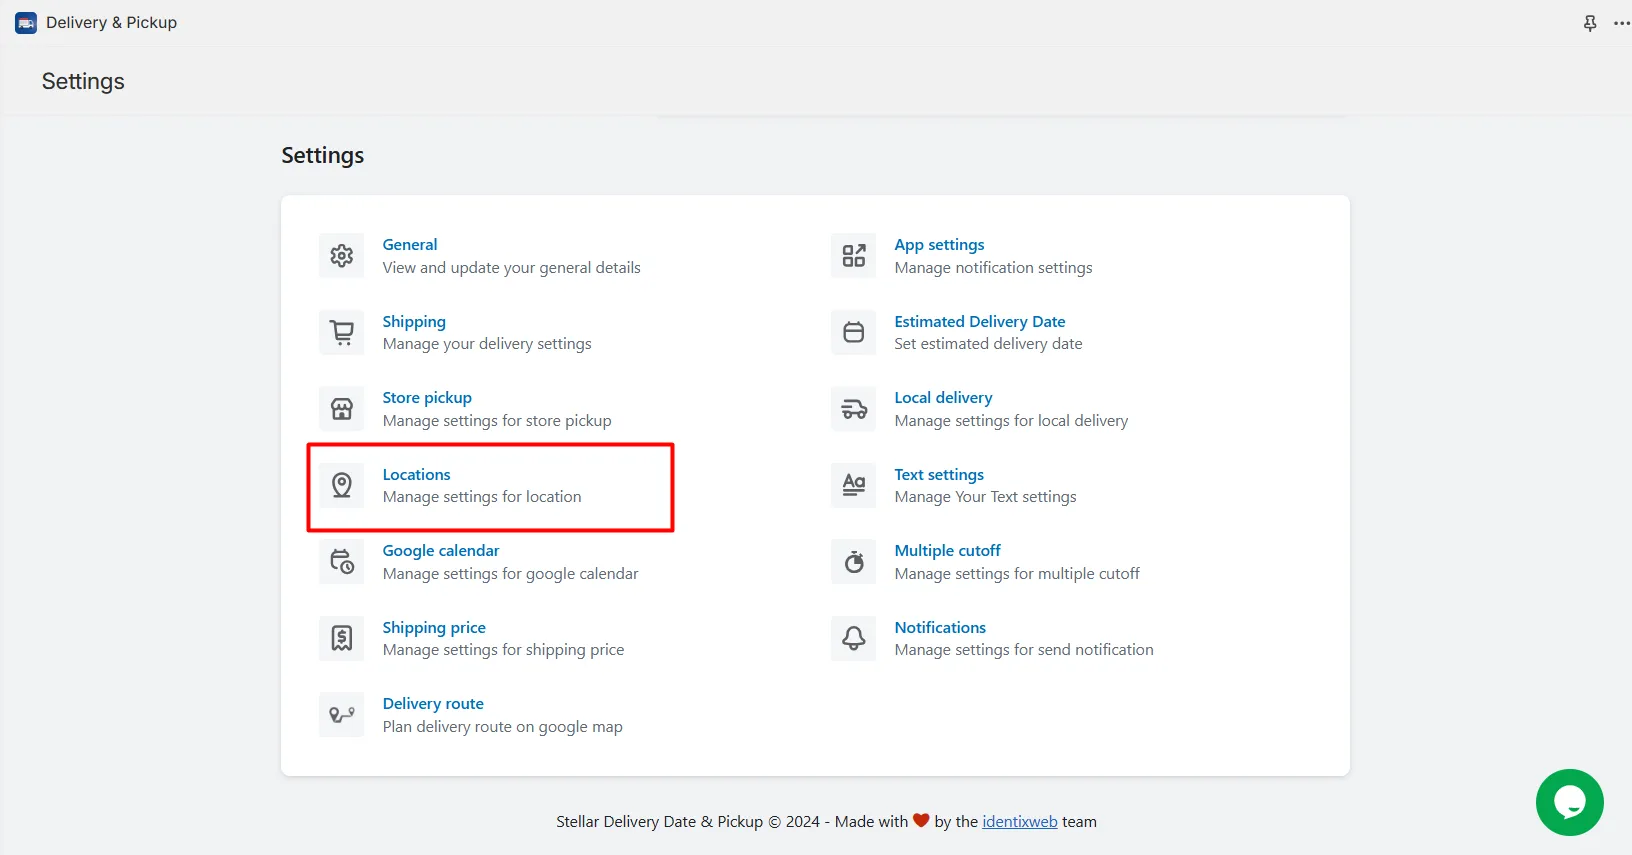
1. Go to Settings and click on Locations.
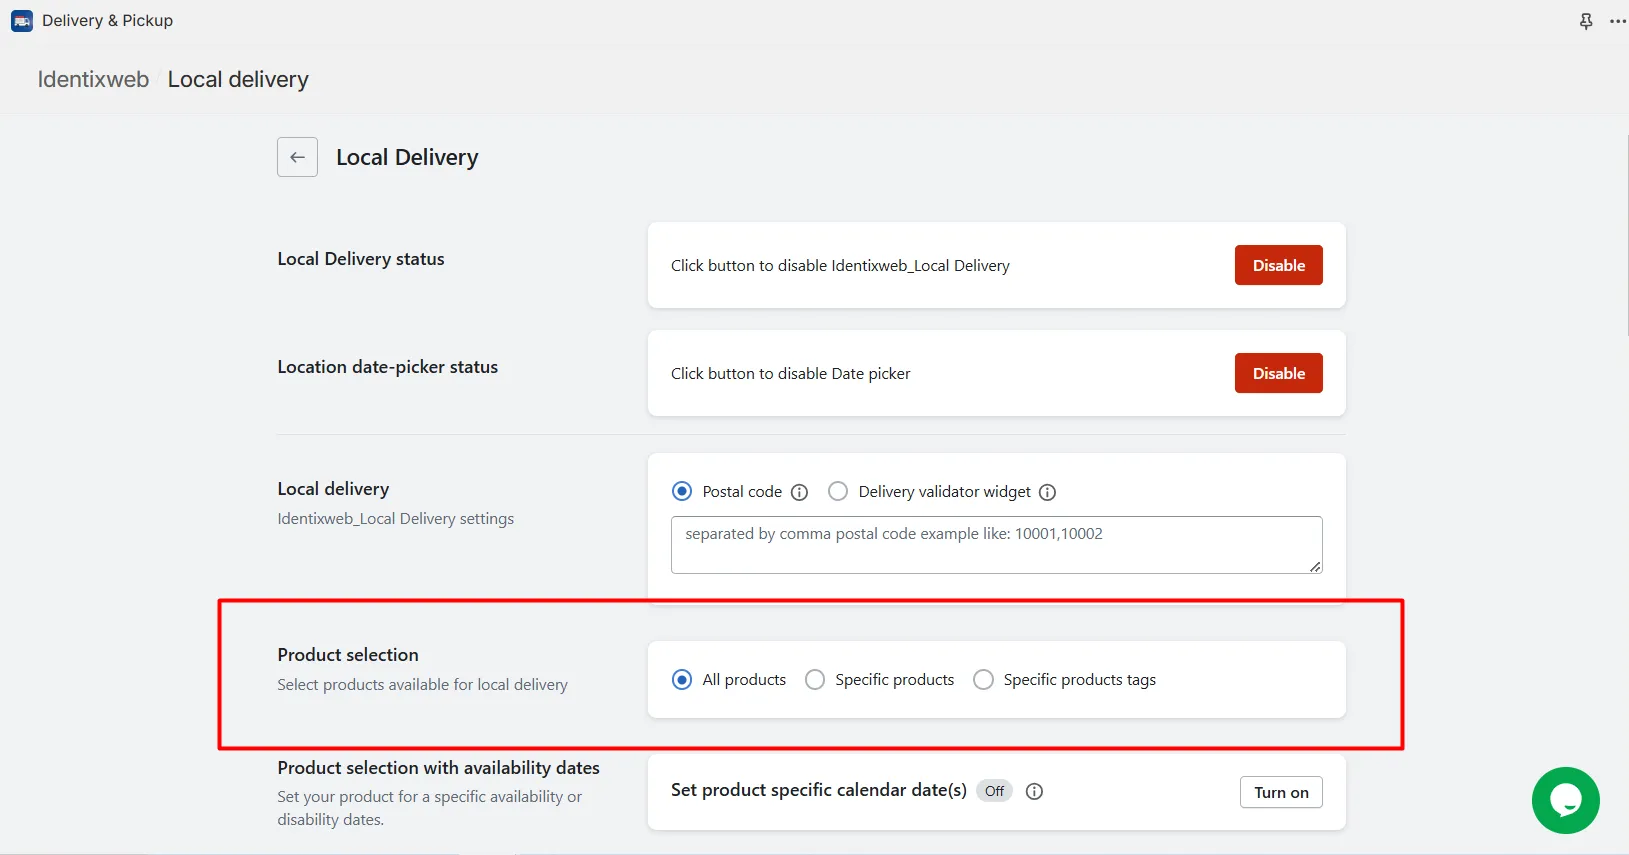
2. Enable date picker for specific products or collections.
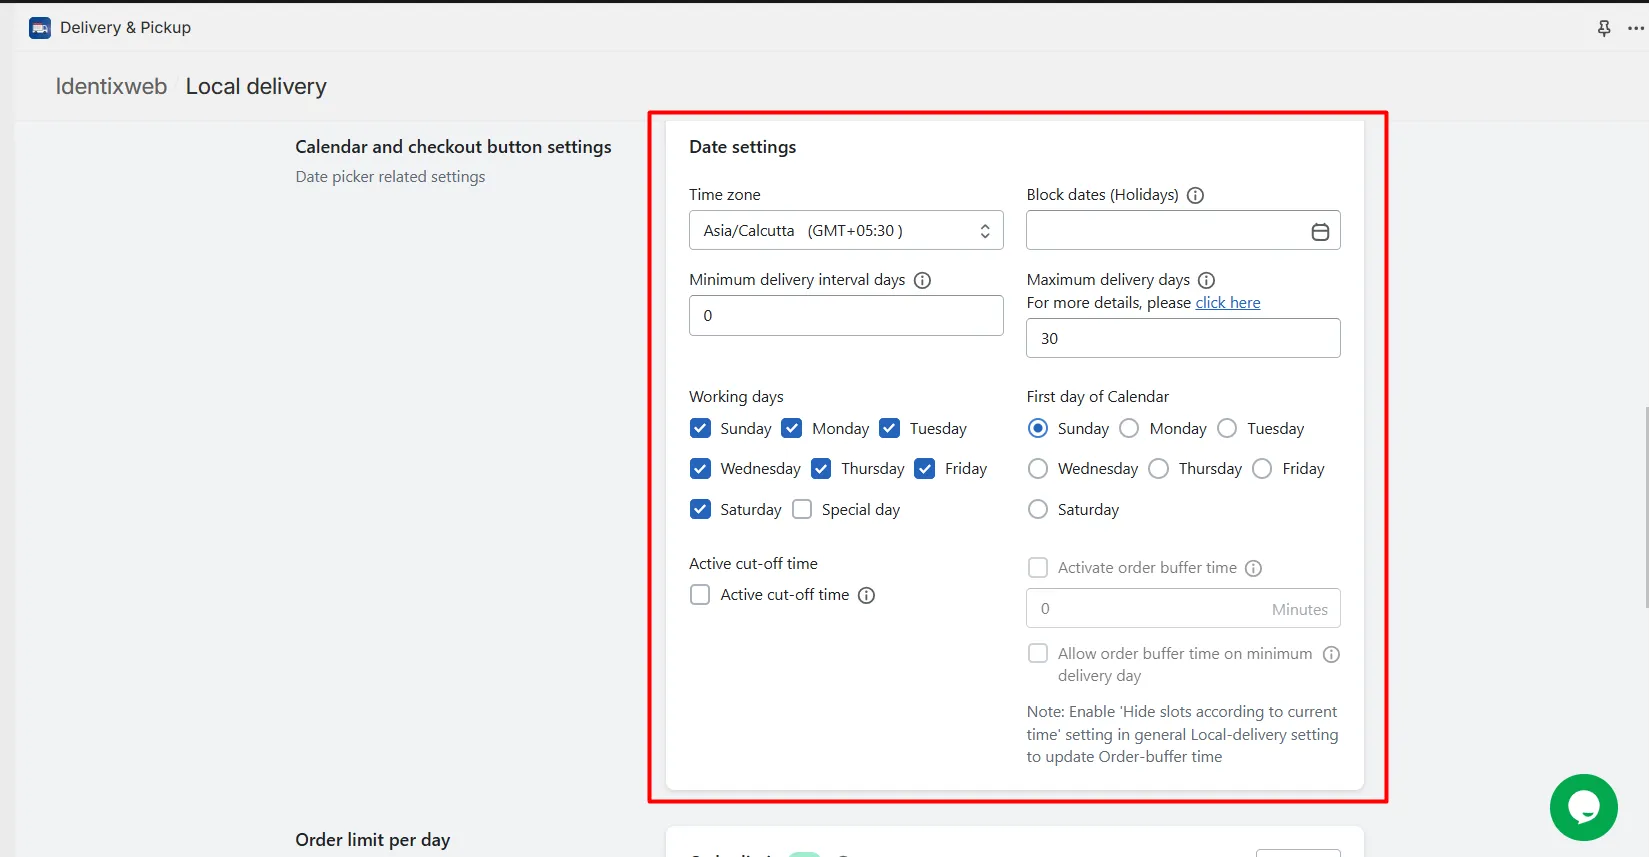
3. Configure the following:
- Available Days: Set delivery days (e.g., weekdays only).
- Time Slots: Allow customers to choose a specific delivery time if applicable.
- Blockout Dates: Block out holidays or non-working days.
- Cutoff Times: Define order deadlines for same-day or next-day delivery.
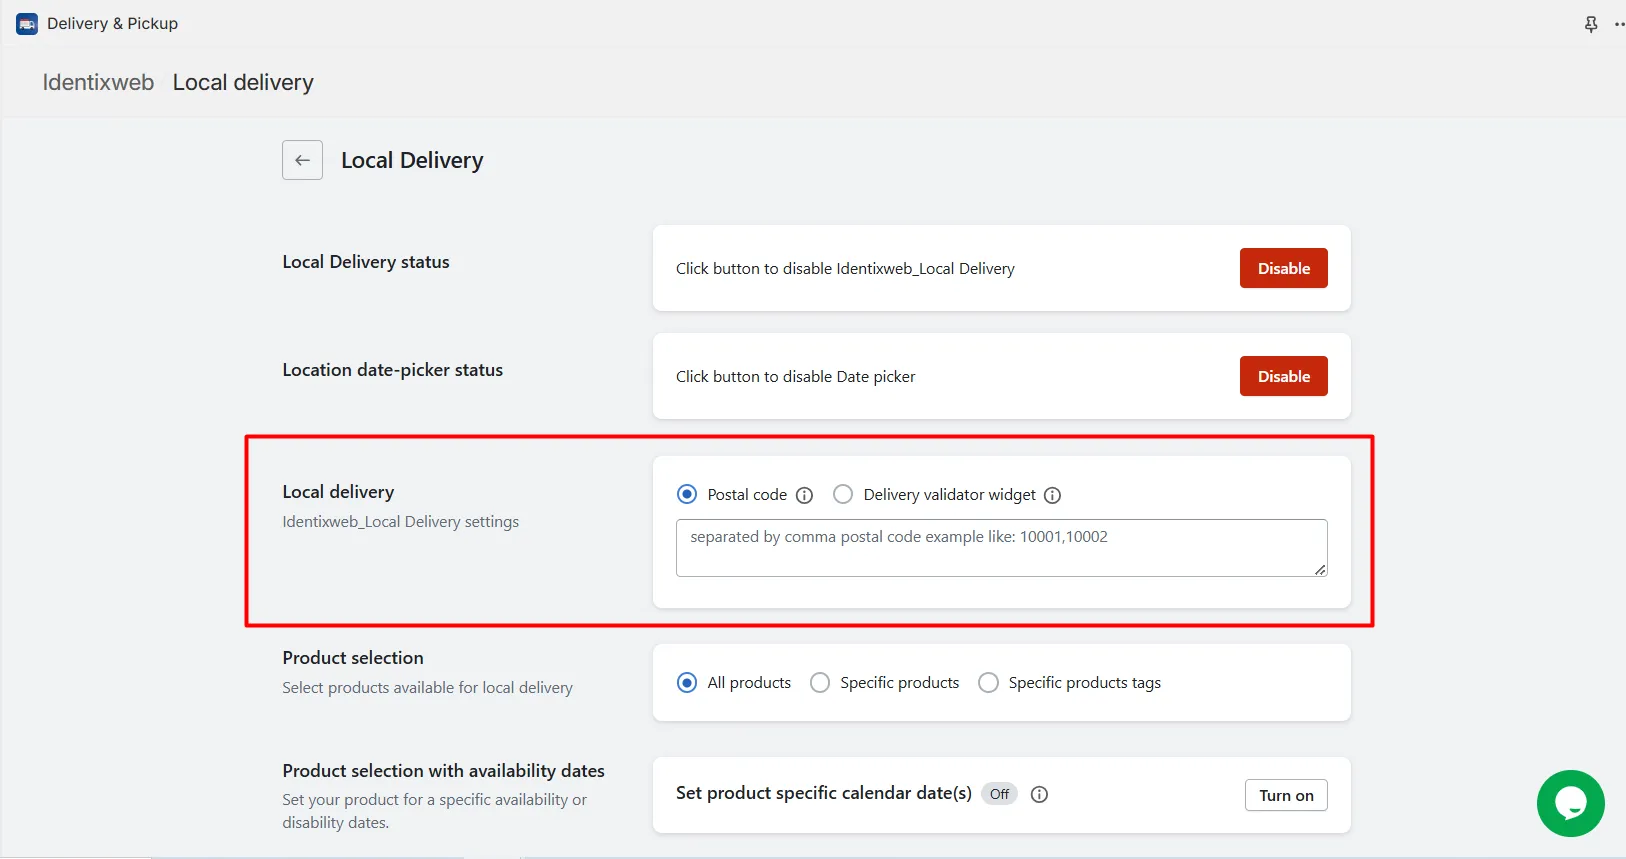
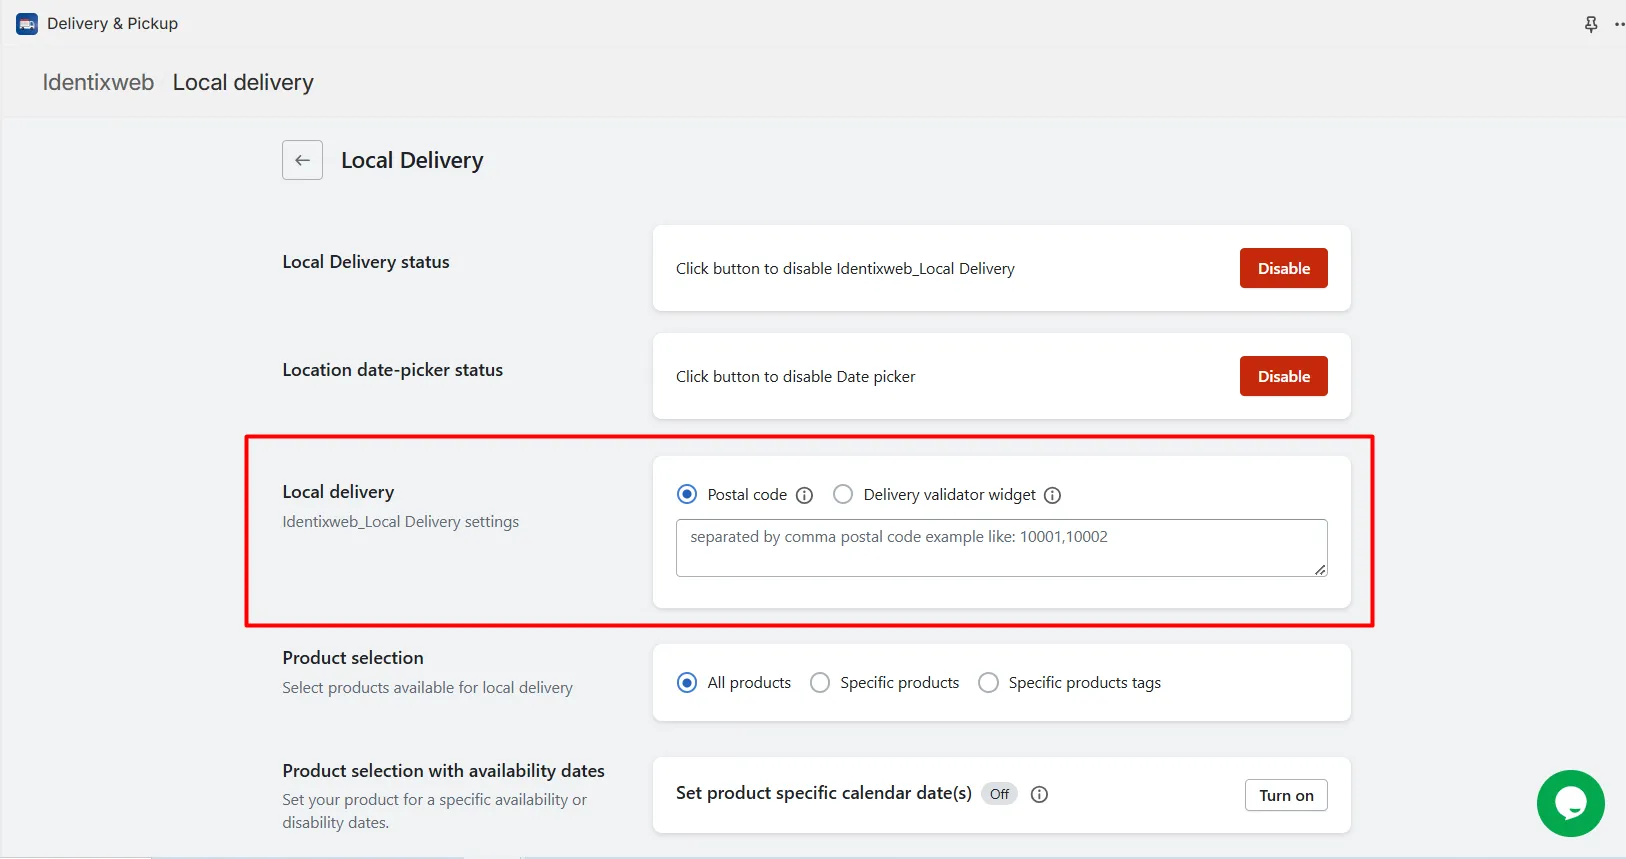
4. Specify the postal codes where you wish to offer order delivery.
Step 4: Optimize and Save
1. Preview your product pages to ensure they are displayed correctly.
2. Place a test order to verify the functionality.
3. Publish the changes to make them live for customers.
Wrapping Up
By implementing a feature like the Estimated Delivery Date & Time and Date Picker, such as through the Stellar Delivery Date & Pickup app, you’re investing in your customer’s experience and your business’s growth. This simple addition can lead to significant rewards, including higher customer satisfaction, increased sales, and stronger, more loyal relationships with your customers.
FAQs
1. How do I add a delivery date on Shopify?
You can add a delivery date by customizing your theme code. This involves adding a date picker input field to your product or cart page using HTML, CSS, and JavaScript. You’ll also need to update your backend logic to save the selected date with the order.
2. How do I see expected delivery dates on Shopify?
To show expected delivery dates, you can use custom code to calculate the estimated arrival date based on your shipping policies. Modify your theme to display this information dynamically on the product or cart page. This typically involves adding a script that determines processing times and shipping durations.
3. How do I automatically calculate Shipping on Shopify?
Set up Shipping Zones and Rates in your Shopify admin under Settings > Shipping and Delivery, or use an app for real-time carrier-calculated rates.
4. How do I make a delivery schedule?
Use apps like Stellar Delivery Date & Pickup to set delivery rules, blockout dates, and available time slots for your store.





About the author
Bhavesha Ghatode
Explore Content with Bhavesha, a passionate and dedicated technical content writer with a keen understanding of e-commerce trends. She is committed to sharing valuable insights, practical assets, and the latest trends that can help businesses thrive in a competitive environment.