


Facebook ads are a great way to advertise your products as Facebook is the top social media powerful advertising platform for product discovery. So are you planning to run Facebook ads? Then you must surely add the Facebook pixel to your Shopify store to understand customer behavior and traffic. This guide will help you to connect Facebook pixels to your store.
Step 1: Find your Facebook Pixel ID
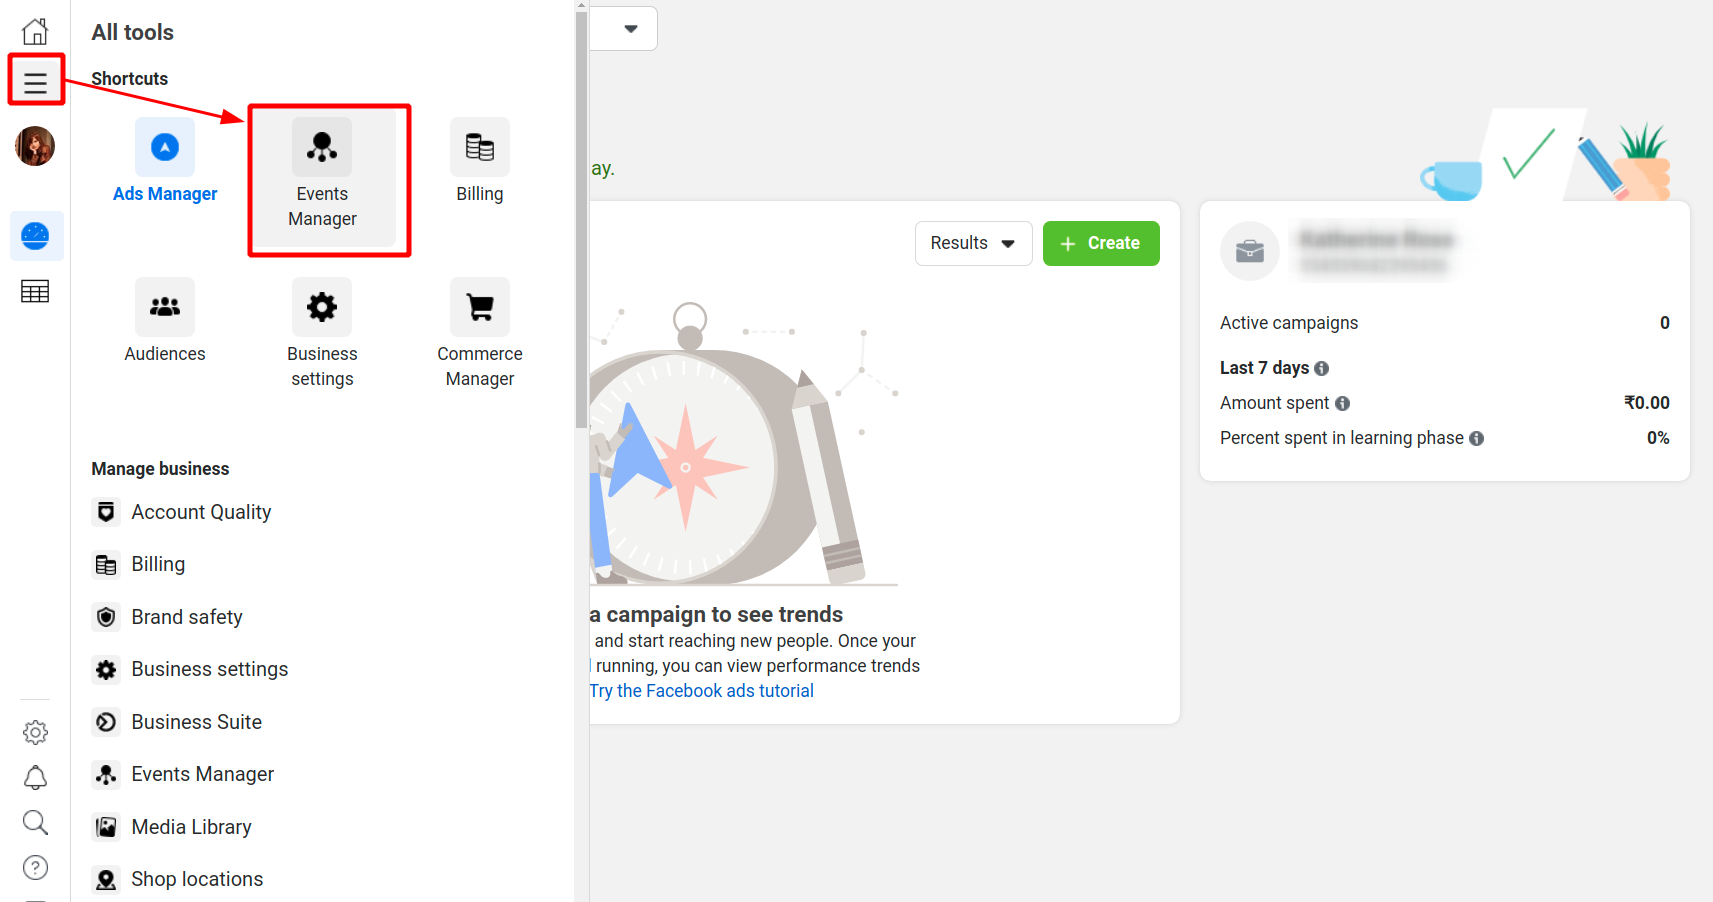
Firstly log in to Facebook Ads Manager. And from the hamburger menu in the top left hand corner click on the All Tools > Events Manager.
Click on the Connect a data source button. Choose the “Web” data source from the given options and hit the Connect button.
![]()
Now here you will see the “Pixels” option. Select the Facebook pixel and click on the Connect button to create the Facebook Pixel ID.
![]()
Next, give a name to your pixel, enter the website URL, and hit the Continue button.
![]()
Here you can find the Facebook Pixel ID. Copy the Pixel ID.
![]()
If you don’t already have a Facebook Pixel number shown then you may need to create a new one. As shown in the image below you will see the “create a Facebook Pixel” prompt in your Facebook Ads Manager.
![]()
Step 2: Paste your Facebook Pixel ID
Now from your Shopify admin, go to Online Store > Preferences. You have to finish the Facebook Setup first on your Shopify store.
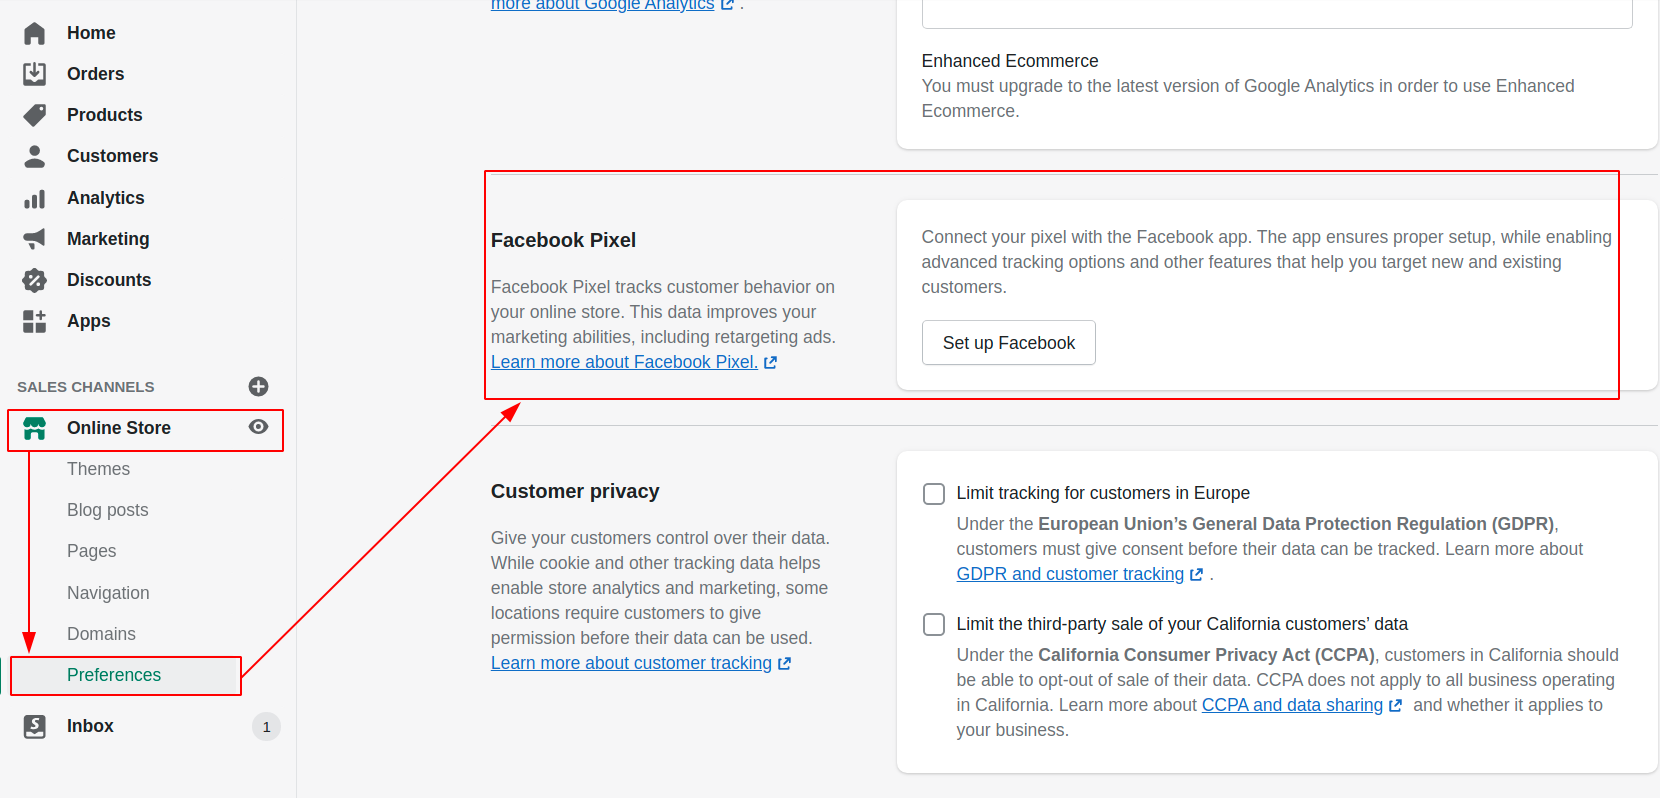
Then you will see the Facebook Pixel section in which you have to paste your Facebook Pixel Id.
![]()
And finally after doing that click Save at the bottom of the screen. After adding the Facebook Pixel to your Shopify store it will track certain events on your online store. To understand how customers interact with your Shopify store use event data and know about using Facebook Pixel standard events.
| Event name | Event description |
| ViewContent | When a visitor views a page, for example, a product page |
| Search | When a visitor makes a search |
| AddToCart | When a visitor adds a product to the shopping cart |
| InitiateCheckout | When a visitor clicks on the checkout button |
| AddPaymentInfo | When a visitor enters payment information in the checkout |
| Purchase | When a customer completes a purchase and views the thank your page in the checkout |
How do I confirm that my Facebook Pixel is working?
Once you have completed the Facebook Pixel setup you can check either through a Facebook Ad that you are already running or just by clicking from anywhere on your Facebook page to your Shopify store. And if you have any issues with it then you can download Facebook’s Pixel Helper to diagnose problems.
Go to a web page where you’ve installed the entire pixel base code, including the page view event. The page view event is automatically included as part of your pixel base code. If your pixel is working correctly, it will send the page view event back to Facebook.
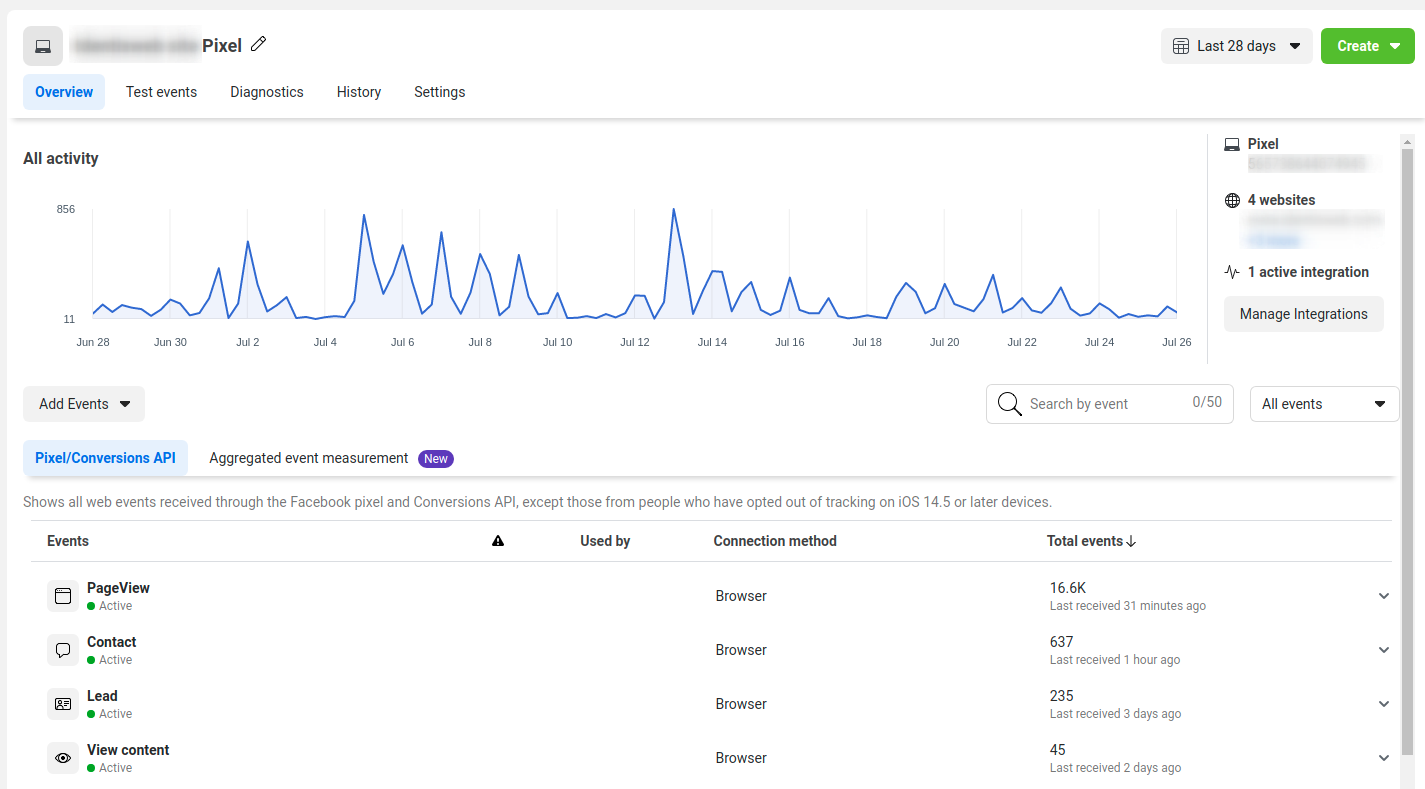
The page view event will appear on the Facebook Pixel page in Events Manager. To get there, go to Events Manager > Data sources > Click on your pixel. Your pixel’s status will also be set to Active.


About the author
Sajini Annie John
Meet Sajini, a seasoned technical content writer with a passion for e-commerce and expertise in Shopify. She is committed to helping online businesses to thrive through the power of well-crafted content.